How do you apply a coupon code to a Shopify cart?


You receive a discount code in your email and think: "Well, now I have to buy that shirt. I can't pass it up at that price." Then you click on the discount code, and it's a hassle to copy and paste the code. It takes too long to enter, and you don't have time, so you abandon your purchase.
As a webshop owner, this is exactly what you want to avoid. That's why today we’ll show you how to solve this issue. In this article, you'll learn how to add a link to an email that automatically applies the coupon code to a Shopify cart. This way, shoppers don’t need to manually enter the code. It makes it easier for customers to use the code, which encourages them to complete their purchase in your store.
But how do you do this in Klaviyo? Here's how:
- First, create a code that you can insert as a parameter in a link. Then, add the link to the button in your email.
- When customers click the button, Klaviyo will direct them to the link, and the discount will be automatically applied to their carts.
Knowledge Check
Before moving forward with this article, it’s helpful to have some basic knowledge. First, read Klaviyo’s guide on "How to integrate with Shopify" for step-by-step instructions on integration. If you’ve already read that guide, you can continue with the steps below.
Create a Discount Code
Alright, now that you understand the basics of how to integrate Shopify with Klaviyo, it's time to get started with discount codes. We’ll walk you through the steps.
1. You can create either a static code or a unique code.
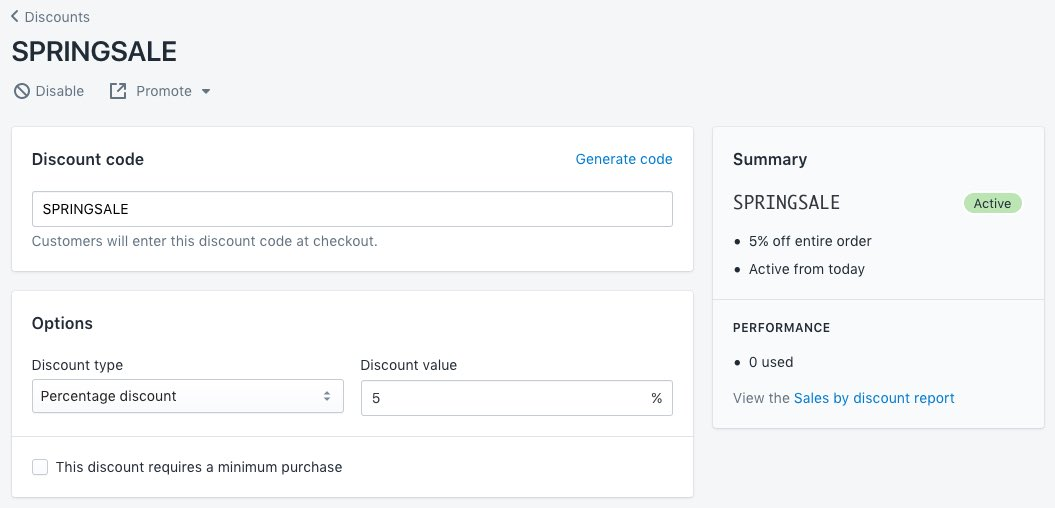
- If you want to create a static code, go to Shopify first. Then, create either a percentage-based discount code or a fixed-amount discount code, depending on the type of promotion you want to offer.
- If you want to create a dynamic code, follow the instructions in the article "How to create unique coupon codes for Shopify".

- Copy the code after you've created it, so you have it ready when you start working on an email template.
- Decide where you want to send the code—this can be in a flow or a campaign email. You can find flows under the ‘Flows’ tab in Klaviyo and campaigns under ‘Campaigns’. Then, open the email in the editor.
- If you haven’t already, add a button with the link to your email.
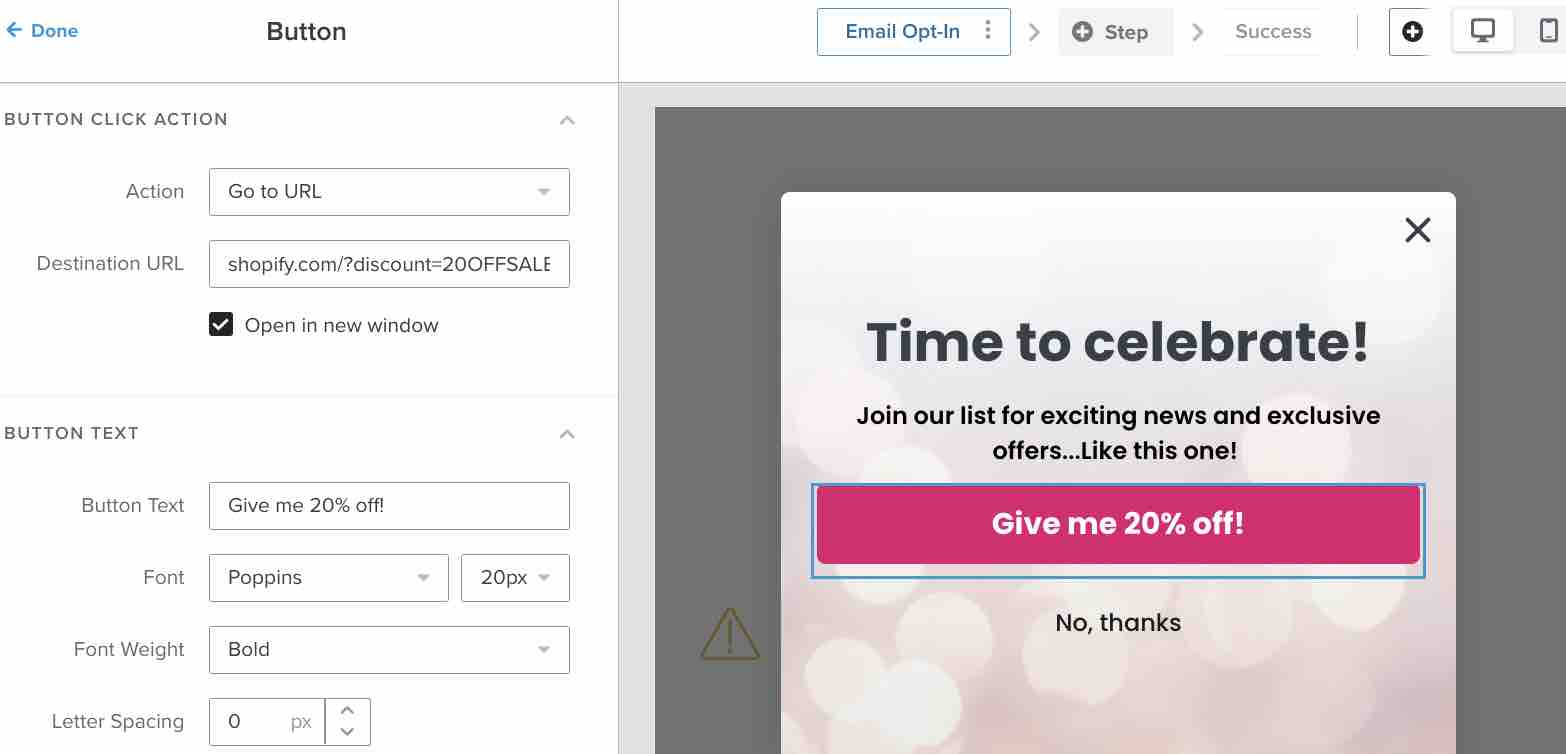
- Click on the button and set the ‘Action’ to ‘Go to URL’.
- Add the link (with the code as a parameter) in the ‘Destination URL’ field of the button. Read the next section to learn how to format the link. Below is an example of a button with a link:

- Adjust the text on the button to inform customers about the discount.
- Click on ‘Save’.
Link in Coupon Code
Be aware that Klaviyo cannot guarantee that a coupon will automatically be applied at checkout if you don't initially link your customers to a checkout page. Shopify may remove the coupon from the URL. If you're not linking to a checkout page and experience this issue, contact your theme developer.
Apply Discount Code and Link to Checkout
Shopify syncs the ‘Checkout Started’ event with Klaviyo, which includes a ‘Checkout URL Property’. This URL Property links back to each customer’s unique cart. If you're sending Abandoned Cart emails and want to link a customer to their abandoned cart with a discount code applied, add the following snippet:
{{ event.extra.checkout_url }}&discount={% coupon_code 'CouponName' %}
Apply Discount Code and Link to Homepage
You can also add a link that redirects to your site’s homepage while automatically applying the discount to the customer's cart. You can use various formats for this:
- mysite.com/discount/CouponName
- mysite.com/?discount=CouponName
Dit tweede format werkt wanneer de korting de enige parameter is die je aan de link toevoegt. - mysite.com/discount/{% coupon_code 'CouponName' %}
In all the above options, replace ‘mysite.com’ with your website, and replace ‘CouponName’ with the discount code you created in Shopify.
Apply Discount Code and Link to Other Pages
Perhaps you want to apply a discount code to a shopping session but don't want to redirect the customer back to the homepage or rebuild their abandoned cart. Instead, you might want to send them to another page on your site. In this case, you can use one of the following URL structures:
- mysite.com/discount/CouponName?redirect=/new-path
- mysite.com/discount/{% coupon_code 'CouponName' %}?redirect=/new-path
In each structure, replace:
- ‘mysite.com’ met je website
- ‘CouponName’ met de naam van de kortingscode
- ‘new-path’ met de gewenste URL-extensie. Als je bijvoorbeeld iemand wilt linken naar een specifieke verzamelpagina, gebruik je ?redirect=/collections/mycollection
Troubleshooters
Below are some quick tips for troubleshooting issues when creating coupon codes:
- When previewing a message, keep in mind that you won’t see a live coupon. Instead, you'll see the coupon name followed by ‘-PREVIEW’.
- Launching a live campaign and the coupon code isn't automatically applied to your cart? Ask yourself the following questions:
- Is the item in your cart already discounted? If so, Shopify does not allow additional discounts on top of existing ones.
- Are there specific products or collections defined in the coupon that the discount applies to? Does the product in the cart match the coupon configuration? If the product doesn’t match the coupon rules, this could be the issue.
- If testing the link in a live campaign doesn't correctly apply the discount code, adjust the parameter. Change the parameter to start with ‘&’ instead of ‘?’.
- This is because ‘?’ only works when the discount is the sole parameter in the link. If you are adding multiple parameters, use ‘&’. So, update your link format to the following, and the link should work:
mysite.com/discount/{% coupon_code 'your_code' %}&redirect=/new-path
If, after following this article, you're still unable to apply coupon codes to carts, take a look at this article for further guidance or ask Polaris Growth for help.
Find the original article here.
%20(1).png)


