

Overview
This article explains how to enable the WooCommerce integration in your Klaviyo account. The main steps to integrate with WooCommerce are:
- Install the Klaviyo WooCommerce plugin
- Enable the WooCommerce integration
- Sync your WooCommerce signup form with a Klaviyo list
We will also discuss adding an opt-in checkbox to your WooCommerce checkout page and how to connect it to your Klaviyo subscriber list. The WooCommerce integration synchronizes real-time data with Klaviyo.
Install the Klaviyo WooCommerce Plugin
With the Klaviyo WooCommerce WordPress plugin, you can add a signup form to your website for your newsletter, enable website activity tracking, and receive data when people begin checking out or viewing products, allowing you to send cart abandonment or browse abandonment emails.
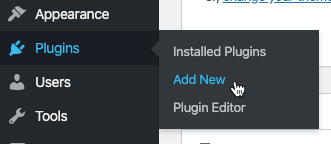
Go to WooCommerce to upload the plugin. Hover over the Plugins tab and click on Add New.
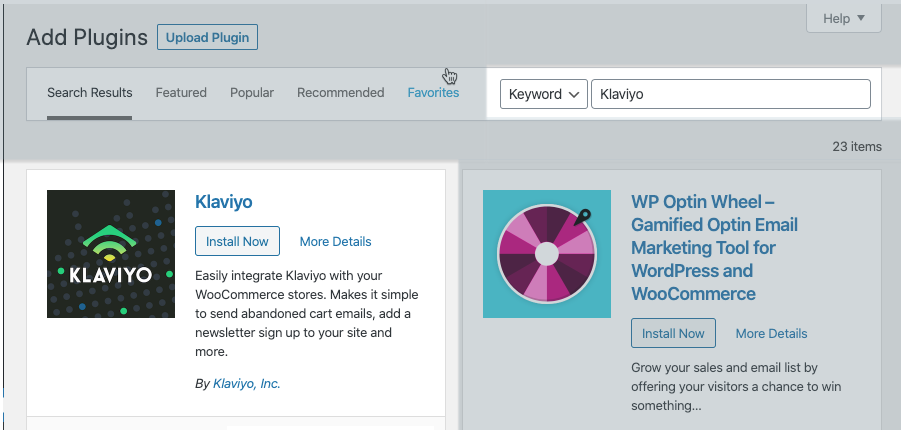
Search for "Klaviyo" in the Search plugins field. Once you find the Klaviyo plugin, click on Install Now.
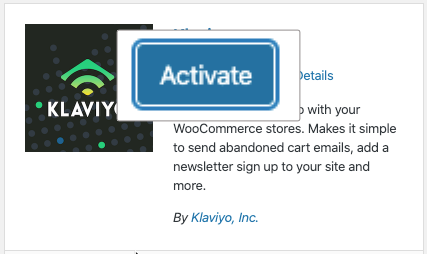
Click on Activate to enable the plugin.
Your plugin is now installed. To configure your plugin, you will need your Public API key / Site ID.
Switch back to Klaviyo and go to Account > Settings > API keys. Copy your API key.

Return to WordPress and navigate to Plugins. Scroll down to find the Klaviyo plugin and click on Settings.

Fill in the following settings:
- Public API Key: Also known as your site ID. Paste the public API key / site ID that you copied earlier.
- Enable Klaviyo Signup Forms: Check this option to allow Klaviyo signup forms on your website.
- Disable Configuration Warning: This will prevent configuration warnings from appearing. We recommend not checking this option.
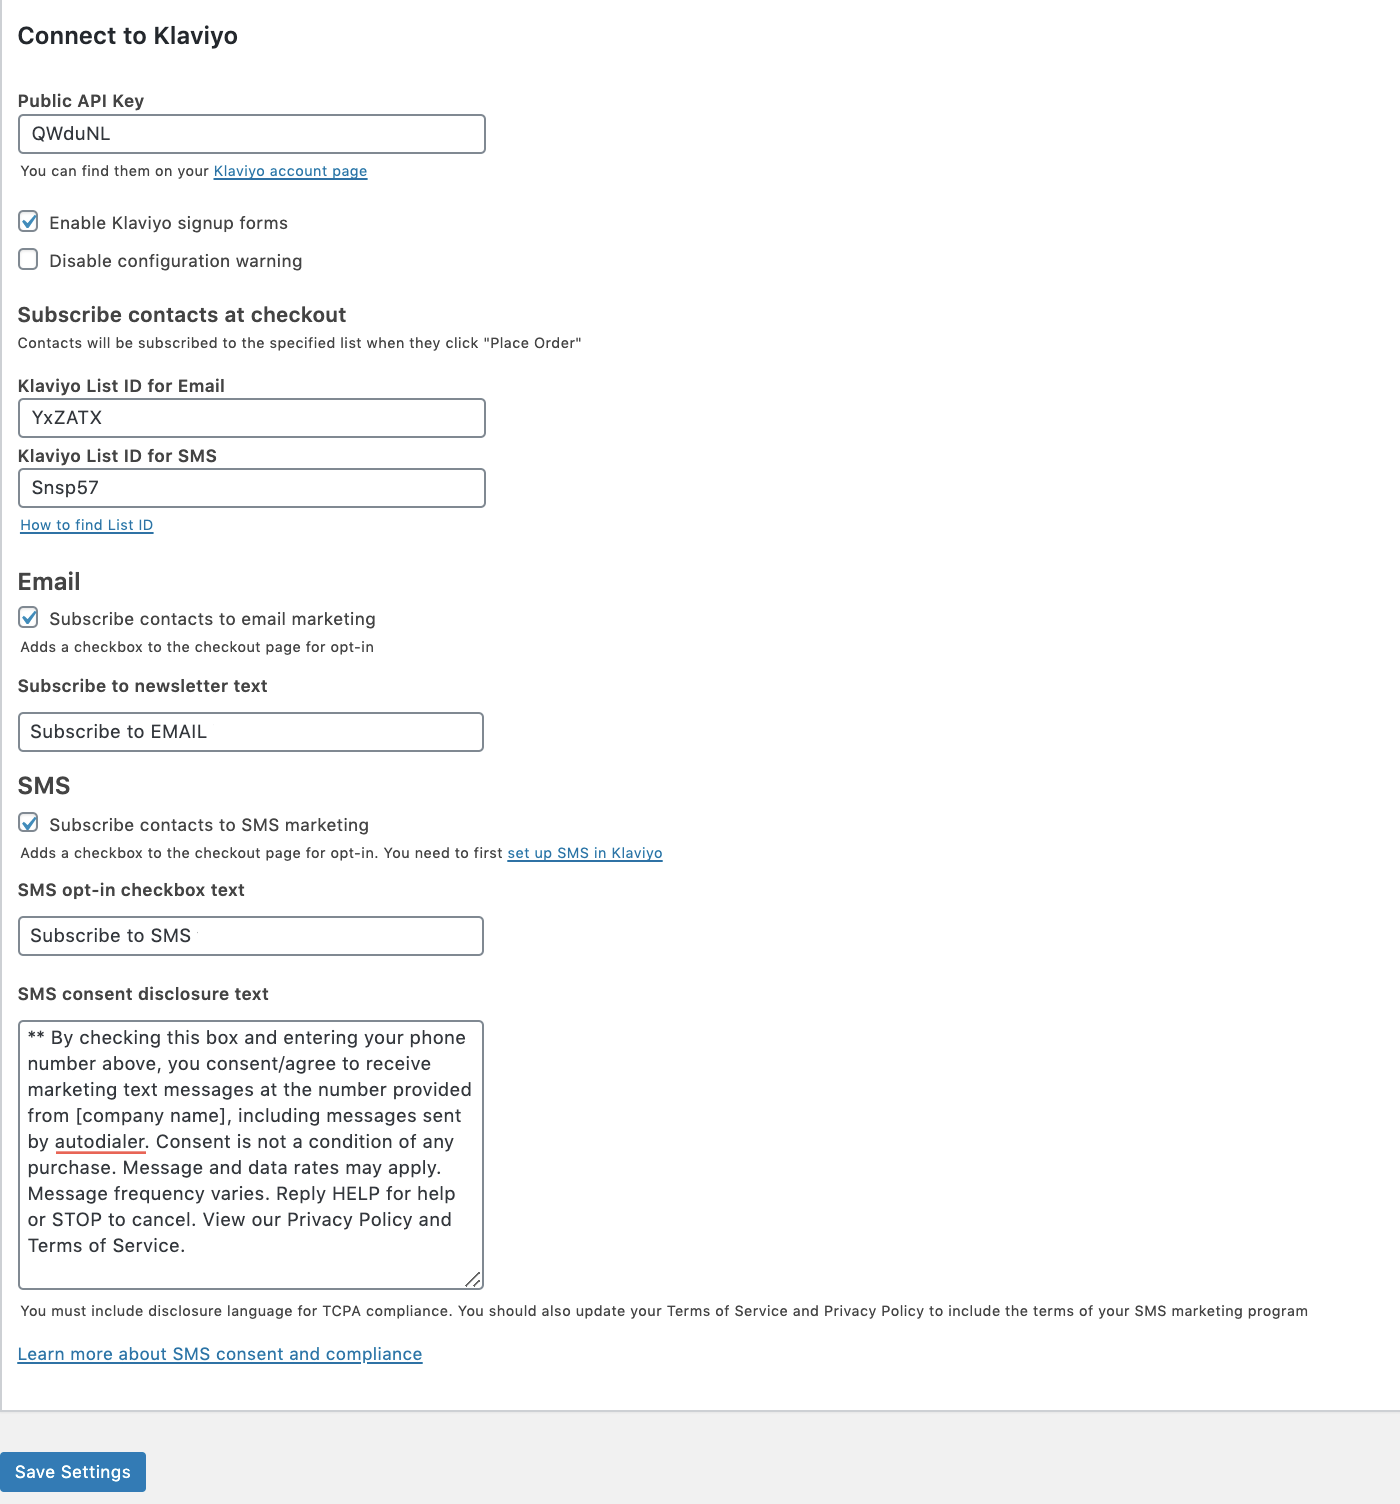
Click on Save Settings.
Your plugin will be updated directly through your WordPress store. Release notes can be found bundled with your plugin updates. See "Find the Release Notes" at the end of this article for more information.
Enable the WooCommerce Integration
To enable the WooCommerce integration, first create an API key and a secret in your WooCommerce account. Then, go to Klaviyo and add the API and secret to your WooCommerce integration settings.
Navigate from WordPress to WooCommerce > Settings > Advanced > REST API. Generate an API key and secret by clicking on Add Key.

Fill in the details for the Key:
- Description: Enter a name such as "klaviyo".
- User: Keep the default user or select another from the dropdown.
- Permissions: Choose Read/Write.
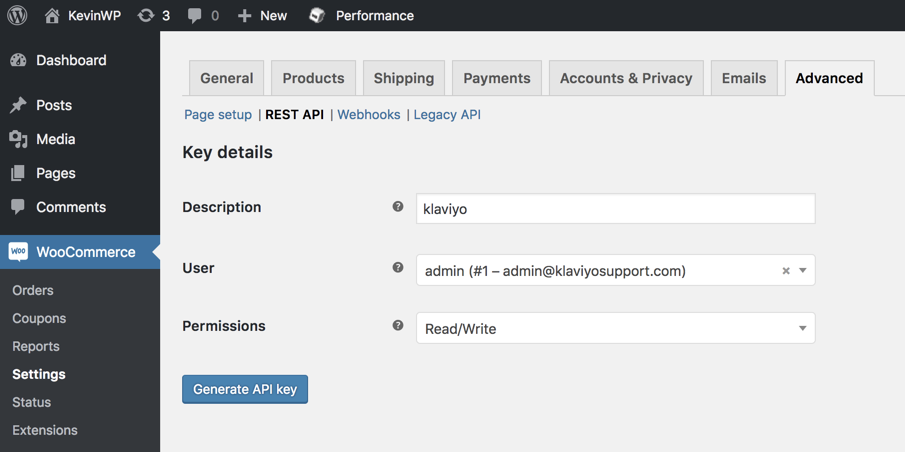
Click on Generate API Key.
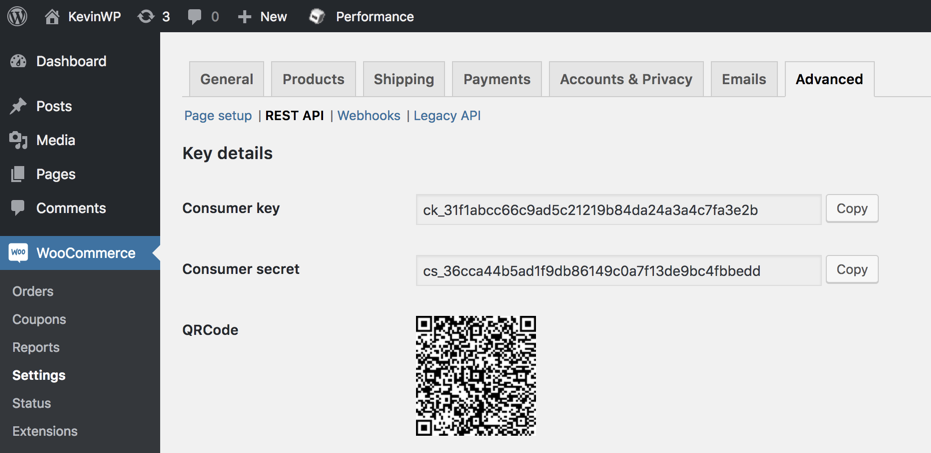
You have now created a consumer key and a consumer secret. Keep this tab open, as you will need both values for the next step.
Update Your Integration Settings in Klaviyo
Switch to your Klaviyo account and go to Integrations. Search for the WooCommerce integration on the All Integrations tab. Then click on Add Integration.

Enter your integration settings:
- Store URL: This is the same URL that customers use to access your website.
- WooCommerce Consumer Key: Paste the consumer key that you generated in the previous step.
- WooCommerce Consumer Secret: Paste the consumer secret that you generated in the previous step.
- Global Currency Code: If you want to convert all currencies used by your stores to one standard currency in Klaviyo, check the box for Convert all currencies to one standard currency and select a global currency code from the dropdown.
- Subscribe new customers to a Klaviyo list: Generally, we recommend NOT checking this option. If selected, all new contacts who make a purchase will be synchronized to a list. Since WooCommerce does not provide a default "accepts marketing" checkbox, many checkout forms lack this, meaning customers may not be aware they are subscribing. In most cases, it is wise to leave this unchecked. If you choose to use this option, also select a list from the dropdown.
- Enable Legacy API: If you are still using the V1 WooCommerce API, check this box to ensure the integration functions correctly. The V3 API is recommended for faster communication between WooCommerce and Klaviyo.
Remember, you can add an "accepts marketing" checkbox to your checkout via the WooCommerce plugin by enabling the Add a subscribed to newsletter on the checkout page option in your WooCommerce plugin settings. This setting was previously covered in this article under the section Install the Klaviyo WooCommerce Plugin. If you choose to enable this plugin setting, you will also need to provide a list ID, which was discussed earlier in this article.

Click on Connect to WooCommerce. If you encounter issues at this step, double-check that you are using the correct store URL, consumer key, and consumer secret. Remember that the store URL is the same URL that customers use to access your website.
Your data will be synchronized with Klaviyo within a few minutes. You have successfully enabled the WooCommerce integration.
If you receive an error message stating “Unable to test API by fetching order count. Invalid count,” it means that when Klaviyo attempts to validate the WooCommerce integration and fetches an order count, their API does not return a value that Klaviyo expects or returns nothing at all. Since the integration is not yet officially connected to Klaviyo, this issue needs to be resolved within WooCommerce.
The best way to check this is by using an application like Postman to make an API call to the order count endpoint, which will provide more insight into what is being passed to Klaviyo.
The endpoint you need is: {customers-url}/wc-api/v1/orders/count
Replace {customers-url} with your WooCommerce store URL.
If you have checked this endpoint and WooCommerce and still need assistance, please contact the support team.
Test Your WooCommerce Integration
To test your integration and plugin, go to your website and follow these instructions:
- Add an item to your cart.
- Proceed to the checkout page.
- Fill in your email address on the checkout page.
Next, go to your activity feed on your dashboard and look for the Started Checkout metric, where you should see your checkout session appear.
Synchronize a WooCommerce Signup Form with a Klaviyo List
The last thing you want to do is customize your newsletter signup form to connect with Klaviyo. Go to Appearance > Widgets in your WordPress dashboard. Select Klaviyo: Email Signup and choose the type of subscription you want (depending on your WordPress theme). If you need help finding your Klaviyo List ID, follow these instructions.
Monitoring Historical Data Synchronization
When you first integrate with WooCommerce, Klaviyo will synchronize the last 90 days of your WooCommerce data, allowing you to immediately engage your most recent customers. After syncing the most recent 90 days of data, Klaviyo will begin the full historical data synchronization. Depending on the number of orders, customers, and products your store has, it may take anywhere from a few minutes to several days to synchronize all your data.
Once the historical synchronization is complete, new WooCommerce data will be synchronized with Klaviyo in real time.
To check the progress of the initial synchronization, click on the Metrics tab in the sidebar.
Look for the Placed Order metric and adjust the date range of the graph to see which dates have been fully synchronized. Once the synchronization is complete, the WooCommerce integration will be marked as complete on the Integrations tab.
If you want to verify that all WooCommerce data has been synchronized, you can check the total orders for a few days or a week. Before you start validating, ensure that the time zone of your account matches the settings in WooCommerce.
To check or update your account's time zone, go to the Account Settings page and review the Contact Information > Organization section.
Data Synced in Klaviyo
WooCommerce sends e-commerce events to Klaviyo, which can be viewed under the Metrics tab of your Klaviyo account. Navigate to Metrics and select WooCommerce from the dropdown to view only WooCommerce events. Note that WooCommerce events are associated with a WooCommerce icon.

Klaviyo limits the number of unique metrics you can create to 200. As you approach this threshold, you'll receive a warning in your account, along with an email to the account owner.
The Started Checkout metric is created when:
- A customer logs into their account, adds something to their cart, and then views the checkout page.
- A customer adds something to their cart, views the checkout page, and enters a billing address.
The Placed Order metric is created when a customer completes the checkout process and places an order in WooCommerce.
The Ordered Product metric is created when a customer places an order for a specific item. If a customer orders the same item twice, two Ordered Product metrics will be tracked.
The Fulfilled Order metric is created when an order is marked as "shipped" in your WooCommerce shop.
Note: Klaviyo synchronizes the following statuses for Placed Order by default: processing, completed, refunded, canceled.
For example, if a customer logs into their account and adds two pairs of blue jeans and one pair of black jeans to their cart, a Started Checkout metric will be tracked. Then, if the customer places an order for the blue and black jeans, one Placed Order metric will be recorded, along with three Ordered Product metrics: two for the blue jeans and one for the black jeans. When the products are marked as shipped, a Fulfilled Order metric will be recorded.
Dive depper: View and Understand Your WooCommerce Data
How to Upgrade Your WooCommerce Integration to Real-Time
Start by installing the latest WooCommerce plugin. Then, create a REST API key for the v3 integration with read/write permissions. This differs from the Legacy API key you created when you first installed the plugin.
Update your integration in Klaviyo by selecting Update Settings on the WooCommerce integration settings page.
Please note that to use WooCommerce's API v3, you need to be running WooCommerce version 3.5x or later and WordPress version 4.4 or later.
Other Resources
Congratulations on your installation! Now that your account is set up and integrated, it’s time to start utilizing Klaviyo's core features. After completing the items in this category, you will be fully prepared to make the most of Klaviyo's functionalities. Check out the Getting Started Handbook to ensure you can fully leverage your Klaviyo account.
Once you’re ready, don’t stop there! Klaviyo is a robust platform with numerous features you can use to grow your business.
Reassemble Carts from an Abandoned Cart Flow
You can use WooCommerce data to reassemble carts from an abandoned cart flow. Klaviyo will generate a key for the Started Checkout event that allows you to use a unique link to reconstruct the customer's cart should they return via an email. This unique link works cross-device, allowing the cart (with contents) to be visible on another device or browser.
You can create this link using the following URL parameter in an abandoned cart email flow that is triggered by a Started Checkout event:

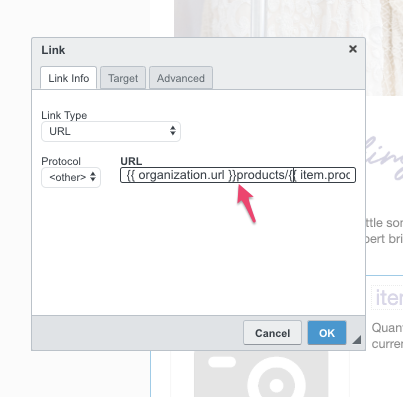
Once assembled, the URL should look like this:

The dynamically generated product title link is pulled directly from the URL you entered in your account settings You may need to add a forward slash to your URL parameters between {{ organisation.url }}and cart to prevent any errors with the destination URL. To add the forward slash, navigate to Table Block > Rows > Column 2 and double-click on the hyperlink of the product title. Add the slash to the URL in the window and click OK.
If you use {{ organisation.url }} to link to an unsecured HTTP URL, you need to manually add your URL using HTTPS to reconstruct the cart correctly.
WooCommerce Subscription Data
Learn About Using WooCommerce Subscription Data in Campaigns and Flows
Installing Plugin Updates
Plugin updates can now be installed directly from your WordPress Admin page. If an update is available, you will see a notification next to your Plugins tab. Click on your Plugins tab, scroll down to find the Klaviyo plugin, and install the update.

If you prefer, you can still manually download the Klaviyo WooCommerce plugin manual from the Wordpress Store.
Finding the Release Notes
Release Notes are included with each new plugin update. Check the Changelog file that comes with each WooCommerce plugin update for more information.
To find your WooCommerce Plugin Release Notes, select Plugins on your WooCommerce Admin page. Scroll down to locate the Klaviyo plugin, click on View Details, and then select the Changelog tab.
WooCommerce Subscriptions in Combination with Klaviyo
If you are working with subscriptions in WooCommerce, it’s advisable to synchronize subscription data to Klaviyo. This does not happen automatically, and you will need to set up an additional integration with a developer. For more information, you can contact Polaris Growth or visit this page.

Blog posts van Polaris Growth
Andere artikelen


Polaris Growth is a CLV e-commerce agency. We support ambitious online stores with: Klaviyo CRM, conversion optimization, data & analytics and ecommerce strategy.