


You will learn how to easily integrate Klaviyo with your Wix website to synchronize customer profile, order, and catalog information with Klaviyo. With this data, you can reach customers with targeted messaging through segmentation, automated flows, and campaigns.
Before you begin
To use the integration between Klaviyo and Wix, your Wix website must meet the following requirements:
- Have a premium subscription
- Have a linked domain name
- Be published
When integrating Wix with Klaviyo, you can connect only one Wix store per Klaviyo account. If you attempt to add a second Wix store, it will replace the first one, but data from the first store will still be present in your account. If you have multiple Wix stores, you need to connect them to separate Klaviyo accounts.
How to integrate Klaviyo with Wix
- Go to your Klaviyo account and click on your company or organization name in the lower left corner, then click on Integrations.
- Select All Integrations and search for Wix.
- Click on Add Integrations.
- Click on Connect to Wix.
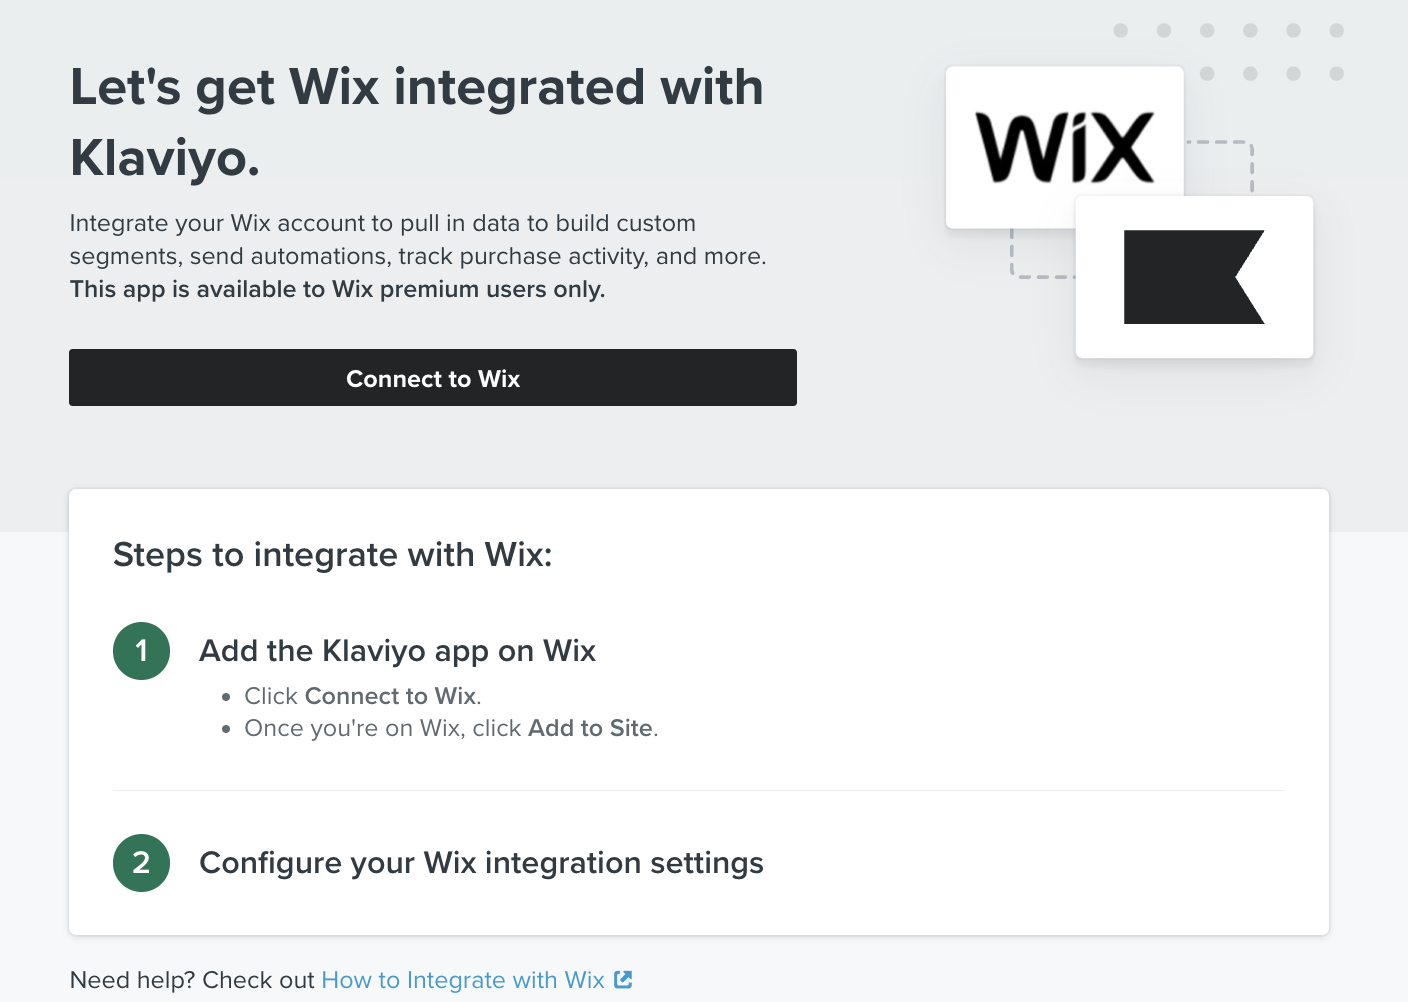
- You will be redirected to your Wix account and prompted to log in (if you are not already logged in).
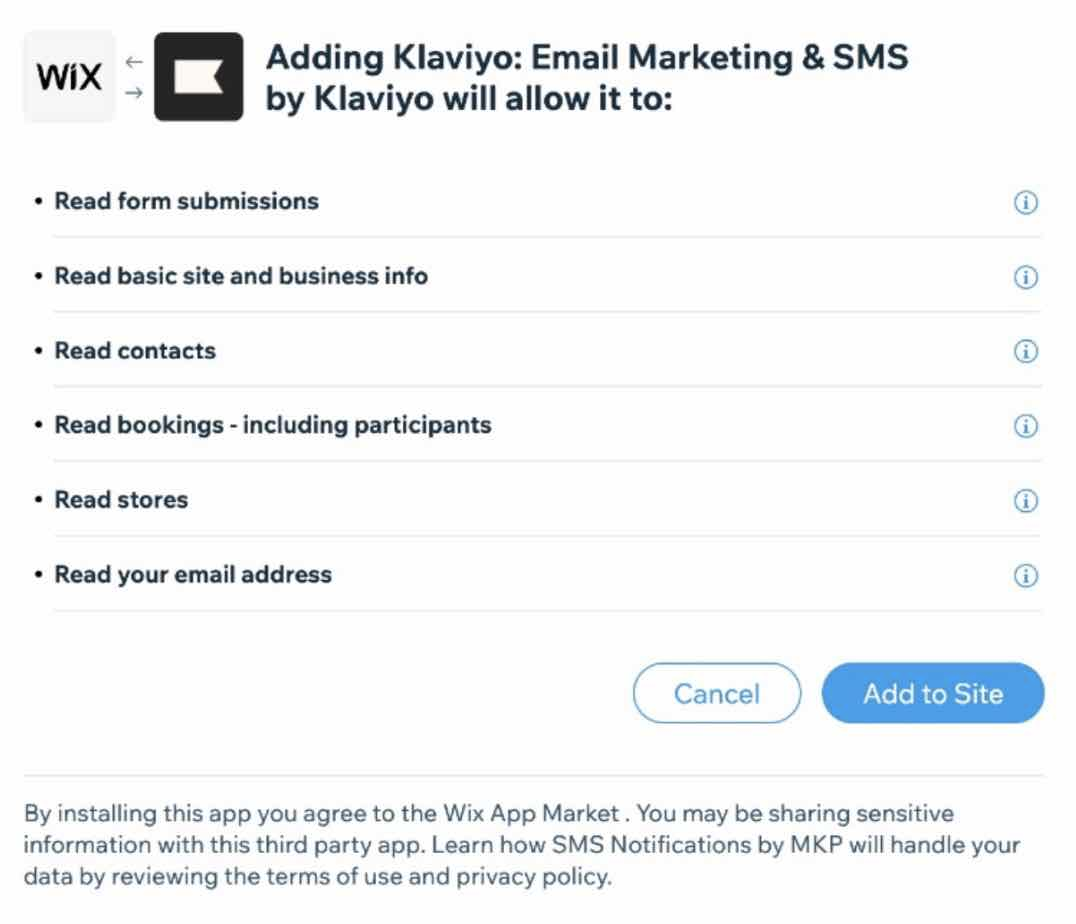
- After logging in, review the permissions and click on Add to Site to return to Klaviyo.
- Check your store URL settings to ensure you have selected the correct Wix account to integrate with Klaviyo.

- The setting Automatically add Klaviyo onsite JavaScript is checked by default; leave it checked if you want to enable Klaviyo's Active on Site tracking on the site and signup form.
- Check the setting Add Wix email subscribers to Klaviyo if you want to do so; customers who sign up for email via Wix, for example during checkout or with a Wix footer form, will be automatically added to the Klaviyo list you select.
- Select a Klaviyo list from the dropdown, such as your Newsletter list, where you want to add subscribers
- If you need to create a new list in Klaviyo, go to the Lists & Segments tab in the Audience dropdown menu.
- Click on Create List/Segment.
- Give the list a name and assign any tags.
- Click on Create List.
- Click on Complete Setup.
- After the loading screen, you should see a success message stating: Your Wix Account is now connected to Klaviyo!
You have completed the integration, and your Wix data will now be synchronized with Klaviyo. If you ever want to edit your Wix settings:
- In your Klaviyo account, click on your company or organization name in the bottom left corner of the screen, then click on Integrations.
- Select Wix from the list of Enabled Integrations.
- You will be taken to the settings page of the integration, where you can make changes.
- Click on Save Settings.
Data synchronized from Wix to Klaviyo
To check the data synchronization from Wix to Klaviyo:
- In your Klaviyo account, click on your company or organization name in the bottom left corner of the screen, then click on Integrations.
- Select Wix from the list of enabled integrations.
- Select the Data tab at the top.
Here you will see recent data that has been synchronized from Wix to Klaviyo, along with a progress bar for the synchronization of historical data.
If you encounter issues with the synchronization, select Restart Import here to restart the synchronization of historical data.
The data synchronized from Wix to Klaviyo includes:
- Known site visitors tracked as Active on Site events (if you have enabled the on-site JavaScript setting)
- Email subscribers (if you chose to add them to a Klaviyo list)
- Profile information linked to order events
- Your Wix catalog
- The following order events:
- Abandoned Checkout (note: there is no historical synchronization of abandoned cart events, only synchronization from the time of integration)
- Placed Order
- Ordered Product
- Refunded Order
- Cancelled Order
- Fulfilled Order
- Fulfilled Partial Order
For more information about the properties linked to each event synchronized from Wix, refer to Klaviyo's article on Wix data references.
Creating Automated Messages with Wix
There are several pre-built flows available for Wix in Klaviyo's flow library that you can use to personalize customer messages.
These flows can be accessed by:
- Selecting the Flows tab in Klaviyo.
- Clicking on Browse Ideas in the top right.
- Selecting Wix from the filter menu next to the search bar.
These pre-built flows include reminders for: abandoned cart reminder, customer winback, cross-sell and repeat purchase nurture flows.
Troubleshooting
Why are my Wix subscribers not being added to my Klaviyo list?
If you're using a Wix sign-up form to collect subscribers on your website but the subscribers who submit your form are not being added to your Klaviyo list, it’s likely because these contacts in Wix are not being tagged as 'subscribed.'
There are many different types of Wix sign-up forms, but not all of them add a 'subscribed' tag to the contact in Wix. This 'subscribed' tag is required for Klaviyo to correctly add the profile to the list you specified on the integration settings page.
If your form adds a 'subscribed' tag when a contact submits the form, the tag will look like this in the contact:
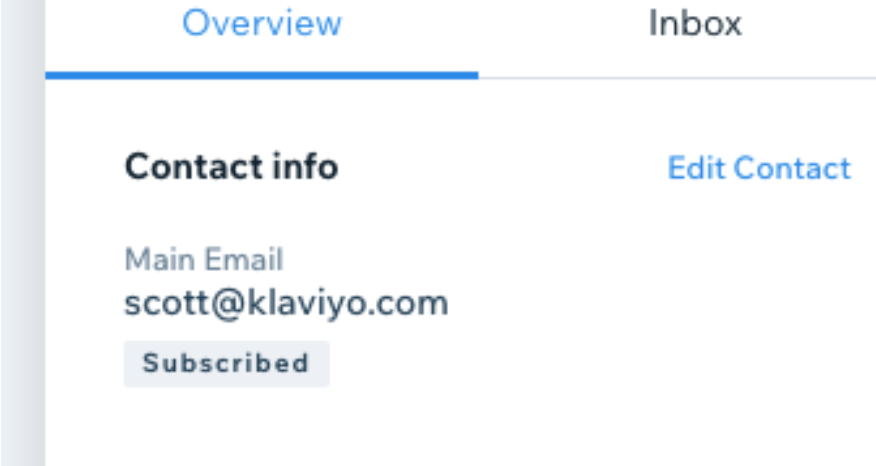
If this tag is missing, you will need to update your Wix sign-up form to ensure that the 'subscribed' tag is added. You can create a subscribe form or add a subscriber field to a standalone form to ensure that the tag is added.
Now your subscribers should be correctly synchronized from Wix to your Klaviyo list.
Result
You have integrated Wix with Klaviyo and verified your synchronized data. Now you can create automated flow messages, personalize campaigns, segment your lists, and more based on the synchronized data from Wix.
If you have any questions about getting started with Wix after reading this article, please contact Polaris Growth for more advice.

Blog posts van Polaris Growth
Andere artikelen


Polaris Growth is a CLV e-commerce agency. We support ambitious online stores with: Klaviyo CRM, conversion optimization, data & analytics and ecommerce strategy.