

.png)
Overview
This guide explains how to add an Add to Cart event that tracks when a customer adds an item (product) to their cart. Klaviyo's built-in Shopify integration already tracks a Checkout Started event when a customer adds an item to their cart and continues to enter their email address during the checkout process. The Checkout Started event is used to trigger the standard Abandoned Cart flow. With a custom "Added To Cart" event, you can trigger an event as soon as customers add items to their cart.
Note: The Add to Cart event is only tracked for users who have previously been tracked by Klaviyo. Once you synchronize your custom Add to Cart events, you can add a flow that is triggered by this event but functions just like an Abandoned Cart flow. This process involves customizing a JavaScript code (included in this guide) and adding it to your Shopify theme files. Please note that you need to have Viewed Product tracking installed for the Add to Cart event to work correctly.
Thee Add to cart code
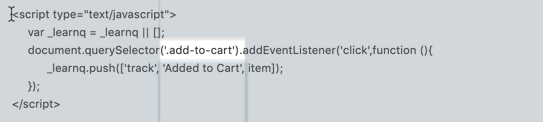
Paste this code directly under the Klaviyo Viewed Product code in your product.liquid theme:

The following screenshot shows this code added to the bottom of the product.liquid file.
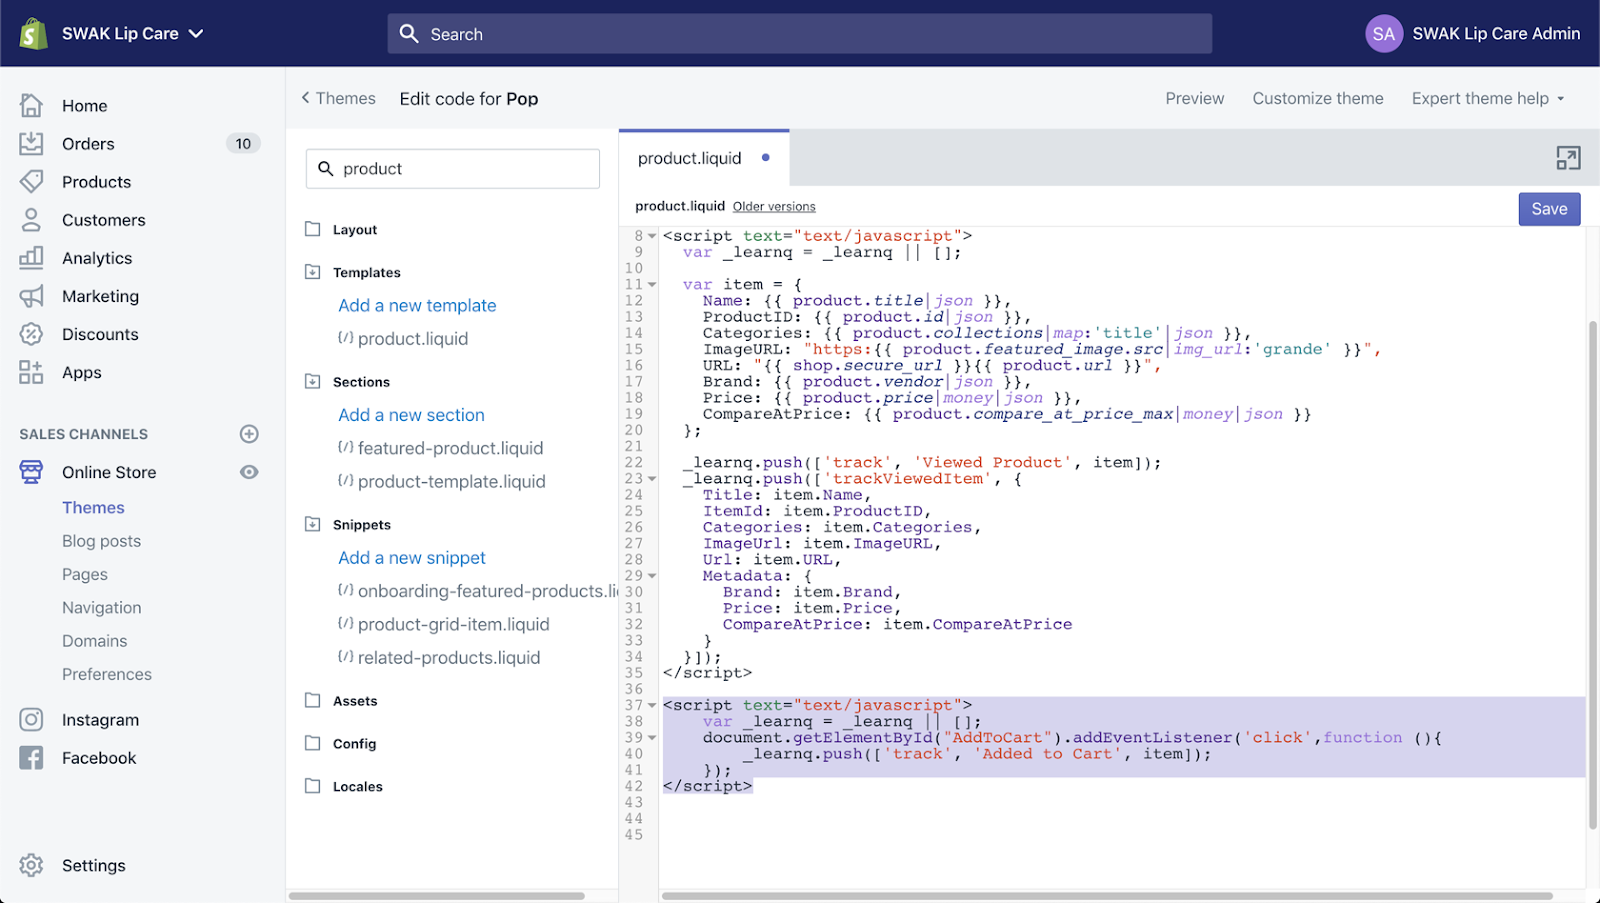
Check if you need to modify your code. In your code, the AddToCart variable should match the ID of your "Add to Cart" button. To check this, open one of your product pages, right-click on the "Add to Cart" button, and select Inspect.

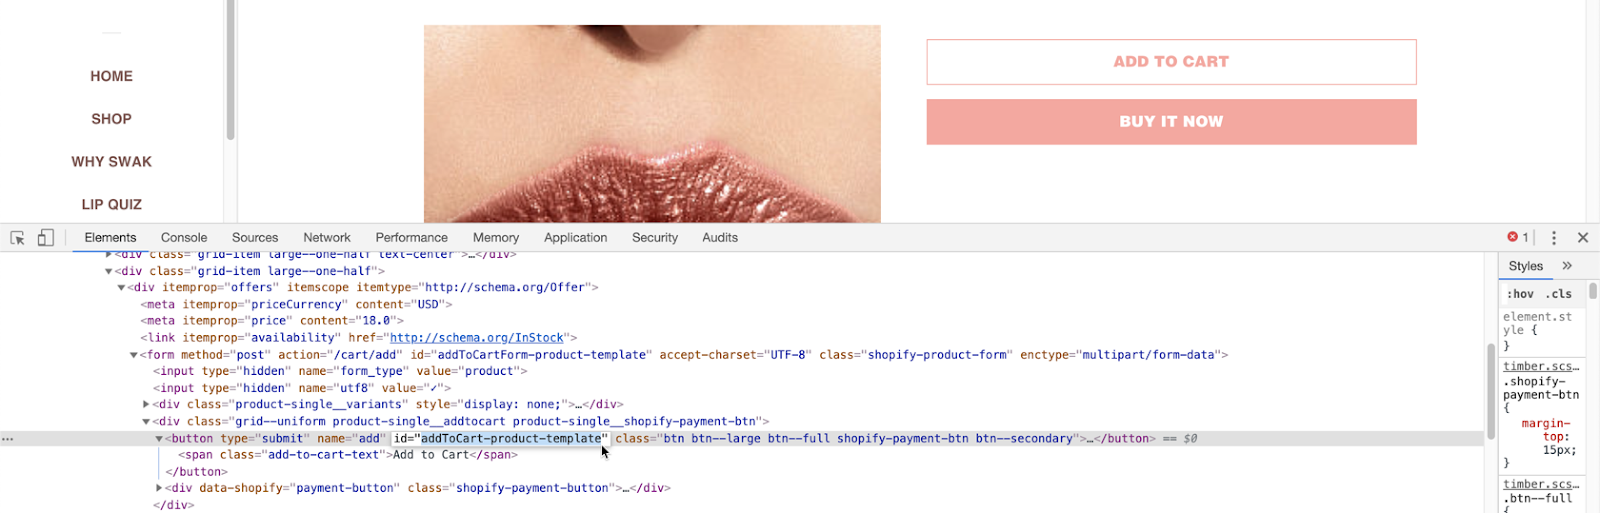
Check the source code of your "Add to Cart" button in the browser console. You want the ID of your button to match the variable in your code. The next image shows the ID of the "Add to Cart" button highlighted in the console. The ID of the button on the page (addToCart-product-template) is different from the ID in the standard code. Therefore, we want to update the code so that it matches the ID on the page.
You can see the updated code in the image below, where the updated ID is highlighted.

Alternative Code for "Add to Cart" Button without ID
Most Shopify theme files use an ID to reference the "Add to Cart" button. For formatting reasons, some Shopify themes only use a class notation to style their "Add to Cart" button. If your "Add to Cart" button does not have a button ID and instead uses a class notation, you can use alternative code to enable the "Add to Cart" event.
Inspect your "Add to Cart" button for an ID.
Navigate to a product page on your website. Right-click somewhere on the webpage and select Inspect.
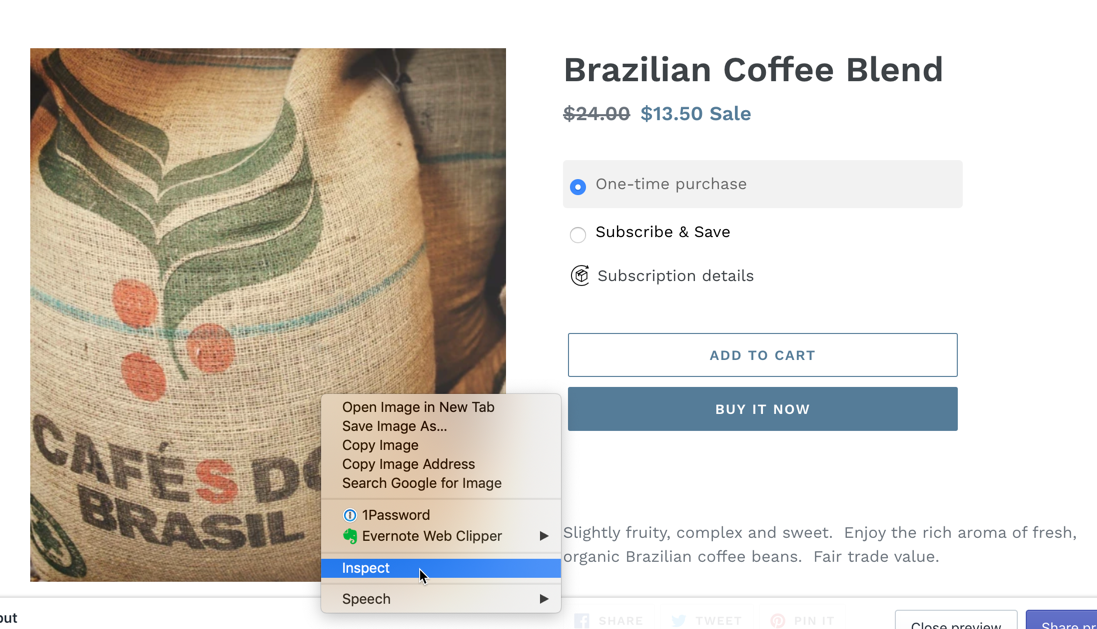
In the console, click on the icon in the upper left corner to select and inspect an element on the webpage.

Hover over the Add to Cart button. You should see the button code highlighted in the console.
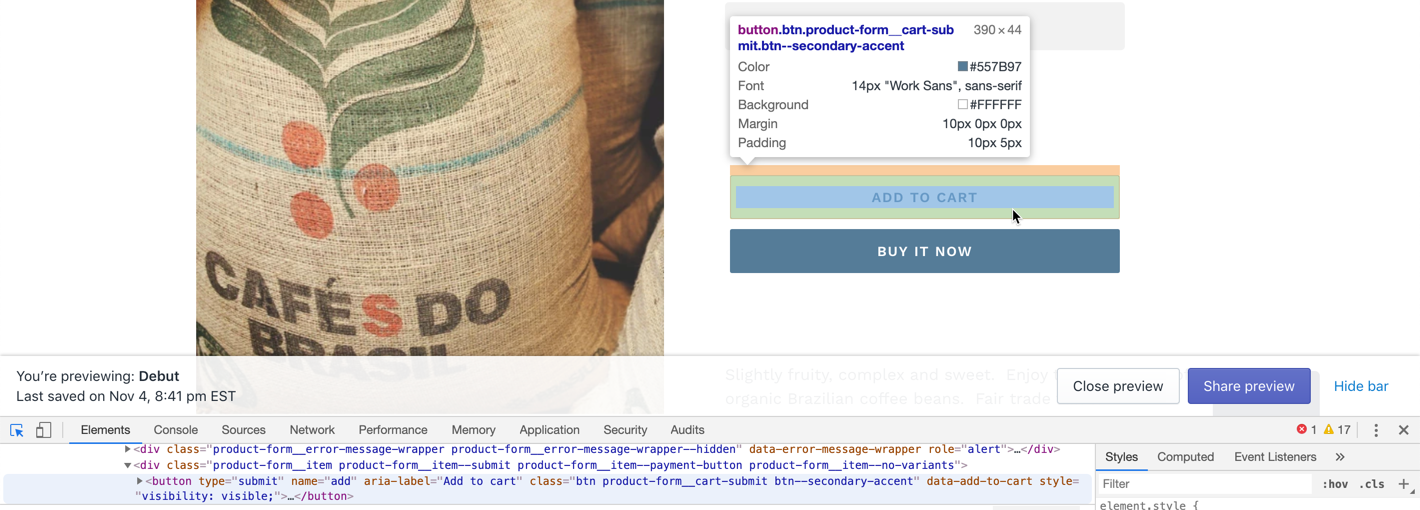
Note that this "Add to Cart" button does not have a button ID; instead, it refers to a class notation:

Replace the Code for the "Add to Cart" Button with Class Notation
If your "Add to Cart" button does not have an ID and only uses a class notation, paste this code (instead of the previous code) at the bottom of your product.liquid file:

Usually, this code does not need to be modified. Sometimes it does.
Compare the code of your button,

with the content of the code:
If these two do not match, modify the code to display the class information.
For example, this piece of code has been modified to display the class value product-form__cart-submit.

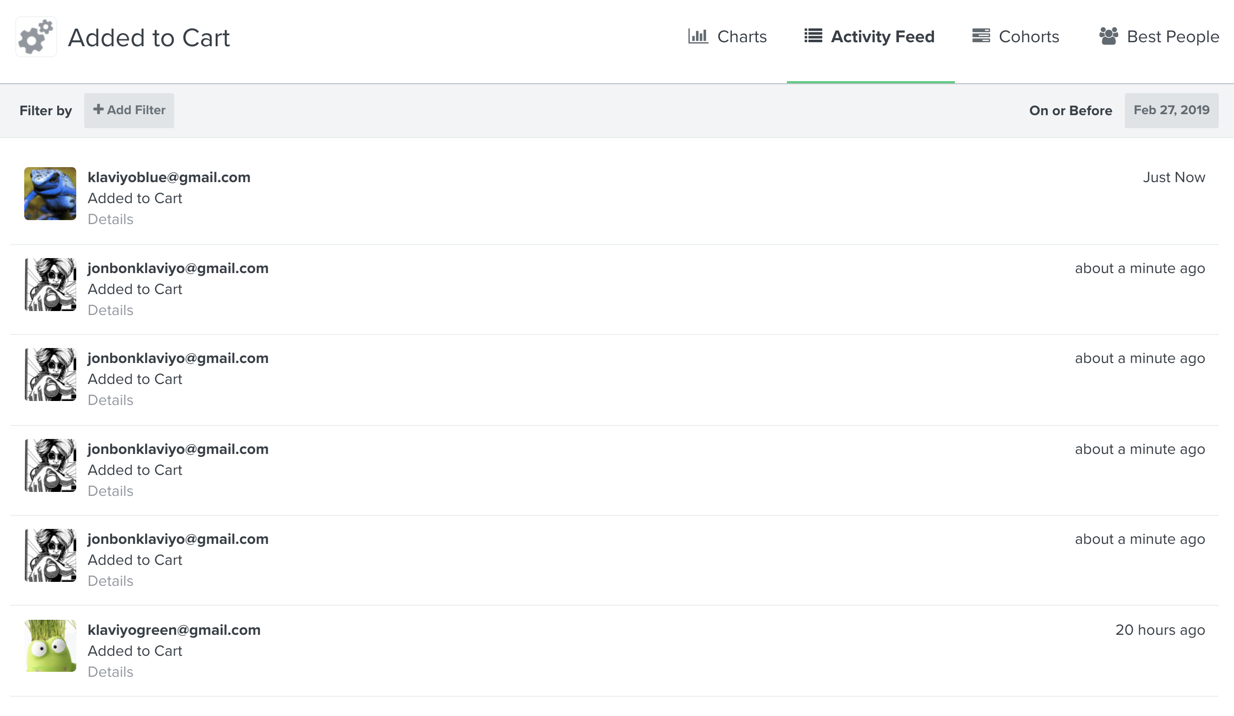
After you have updated your code and saved your theme files, this code will target the "Add to Cart" button and track an Add to Cart event every time one of your customers clicks this button.
This event works in the same way as the Viewed Product event. Each item that someone adds to their cart triggers a new event.
The Abandoned Add to Cart Flow
To get started with an Abandoned Cart flow using the Add to Cart event, we recommend using the pre-built flow available in the Flow Library.
In this library, you can filter or search for all Abandoned Cart Reminder flows and find the one labeled Add to Cart trigger. If you have implemented Klaviyo’s standard Shopify Added to Cart code, this flow is ready to use with all recommended filters and dynamic email content, fully prepared to enable personalized follow-up emails.

If you want, you can also create a new Klaviyo flow and select your custom Add to Cart metric as the trigger. You can build the rest of the flow according to the model of an Abandoned Cart flow. Make sure to add a condition to the flow that prevents customers from being bombarded with emails every time they add an item to their cart. Additionally, if you also send a traditional Abandoned Cart flow triggered by the Checkout Started event, you want to add another filter to the flow to ensure that people who trigger this second flow do not receive your Add to Cart flow.
If you have both an Add to Cart and a Browse Abandonment flow, your customers may receive emails for both flows depending on your Smart Sending settings. We recommend prioritizing the email flow with the highest intent. Therefore, to prevent a customer from receiving both emails, add the filter "Add to cart zero times since starting this flow" to your Browse Abandonment flow.
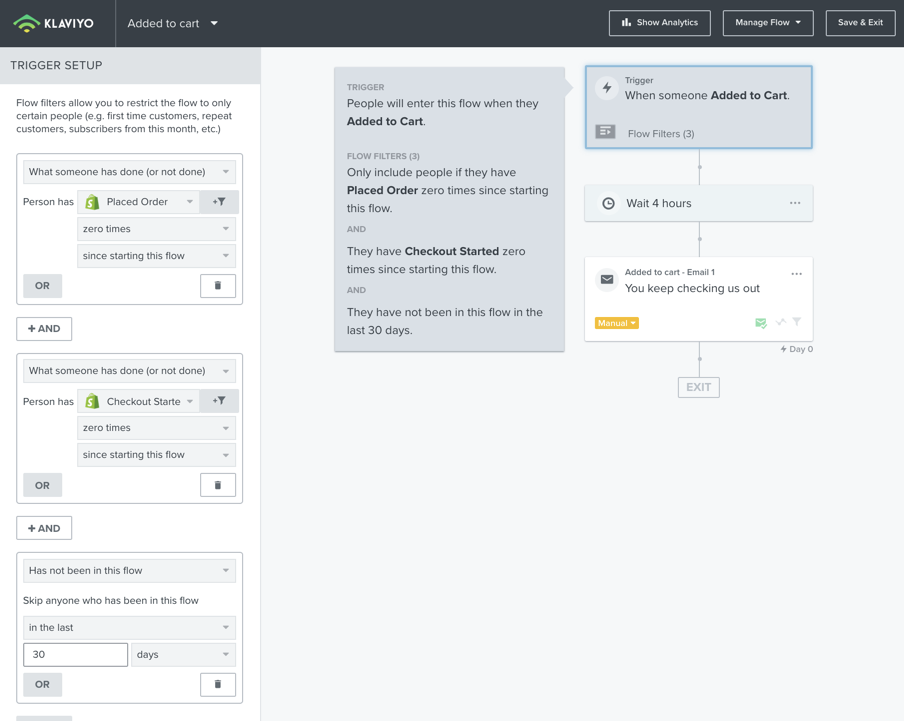
In the next screenshot, the flow trigger contains three filters:
- Someone who has not placed an order since starting this flow.
- Someone who has not started checkout since starting this flow.
- Someone who has not been in this flow in the past 30 days.
The Add to Cart event contains similar data to the built-in Checkout Started event. To dynamically fill your flow emails, you can use the event data and create an email that resembles a standard Abandoned Cart email. After at least one Add to Cart event has been triggered, you can view the data in the event by previewing one of your Abandoned Added to Cart flow emails. Click in the Preview modal on the section of event data that you want to include in your email and copy the code slug that appears.
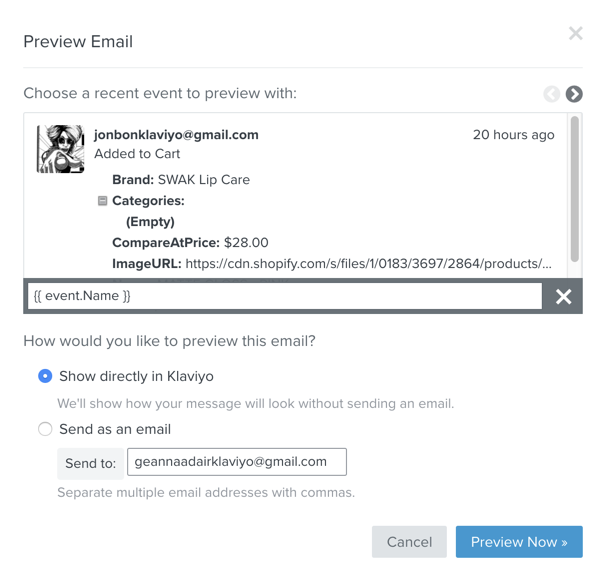
You can then paste this code slug into a text block (or somewhere else). In the image below, the product title has been changed to a simple reminder message.
You can also add more about the product and include a link to the product page (but not to the cart).
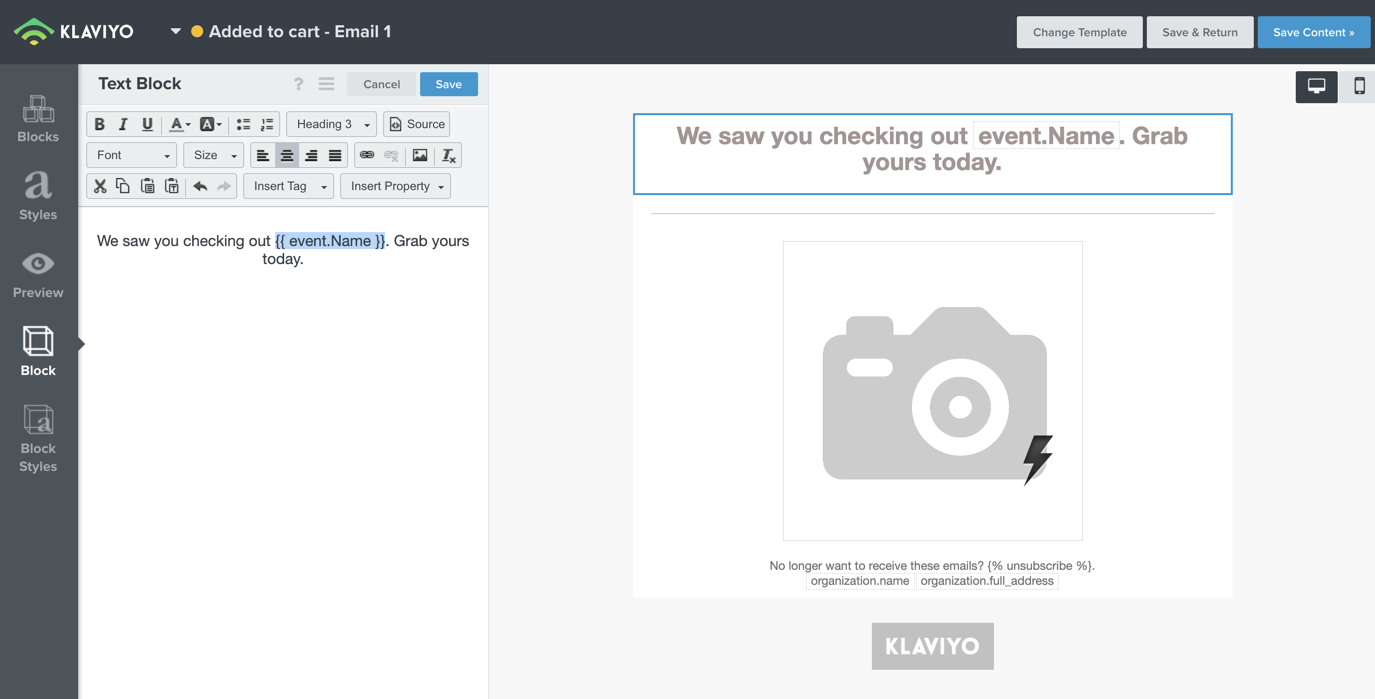
After you save the block, the data will appear dynamically when you preview the email.

Since this Klaviyo flow is triggered when someone adds a single item to their cart, only one item will be displayed in the email. Unlike an Abandoned Cart flow, it is not possible to include multiple items.
Check out Klaviyo’s guide on personalizing Flow emails with dynamic event dataa for more information.

Blog posts van Polaris Growth
Andere artikelen


Polaris Growth is a CLV e-commerce agency. We support ambitious online stores with: Klaviyo CRM, conversion optimization, data & analytics and ecommerce strategy.