

You will learn how to add static and unique coupon codes to your sign-up form to increase customer engagement and conversion rates, encouraging them to spend more on your website. It's effective to include the coupon code directly in the success message of your sign-up form, allowing customers to copy and use the code without leaving your site.
Unique Codes
Unique coupon codes, also known as "dynamic" coupon codes, are unique combinations of numbers or letters that can only be used once by the recipient. Each recipient receives their own coupon code, and no two recipients have the same code. Unique coupon codes are usually longer and more complex than static codes.
Static Coupon
A static coupon means there is one code that all customers can use (e.g., WELCOME20). Everyone receives the same code and can use it on your site. Static codes can be shared; they are easier to remember and use.
Before You Begin
The ability to display static and unique coupon codes in success messages is currently only available for Shopify users and uploaded coupons. If you haven't done this yet, read this guide on how to integrate with Shopify for step-by-step instructions.
This guide will walk you through how to display coupon codes (either unique or static) on a new or existing form to help you enhance these results.
Displaying a Coupon in Your Form
To get started, go to the Sign-up Forms tab. From here, you have a few options to create a form that includes a coupon.
Option 1: Choose a pre-built template with coupons from the Form Library, which you can then customize to your style and purpose.
Option 2: Edit one of your existing forms to add a coupon.
Option 3: Build a new form from scratch and add a coupon.
With any of the above options, you can easily add a coupon block in the form builder. You have the option to choose a static or unique coupon code.
Add a Coupon Block to the Success Step of Your Form
Just as you can add a text block to any form, you can also easily add a coupon block in the form builder. Follow these instructions for both static and unique coupons:
- Open the new or existing form where you want to place the coupon.
- Click on Success at the top of the page to go to the Success step of your form.
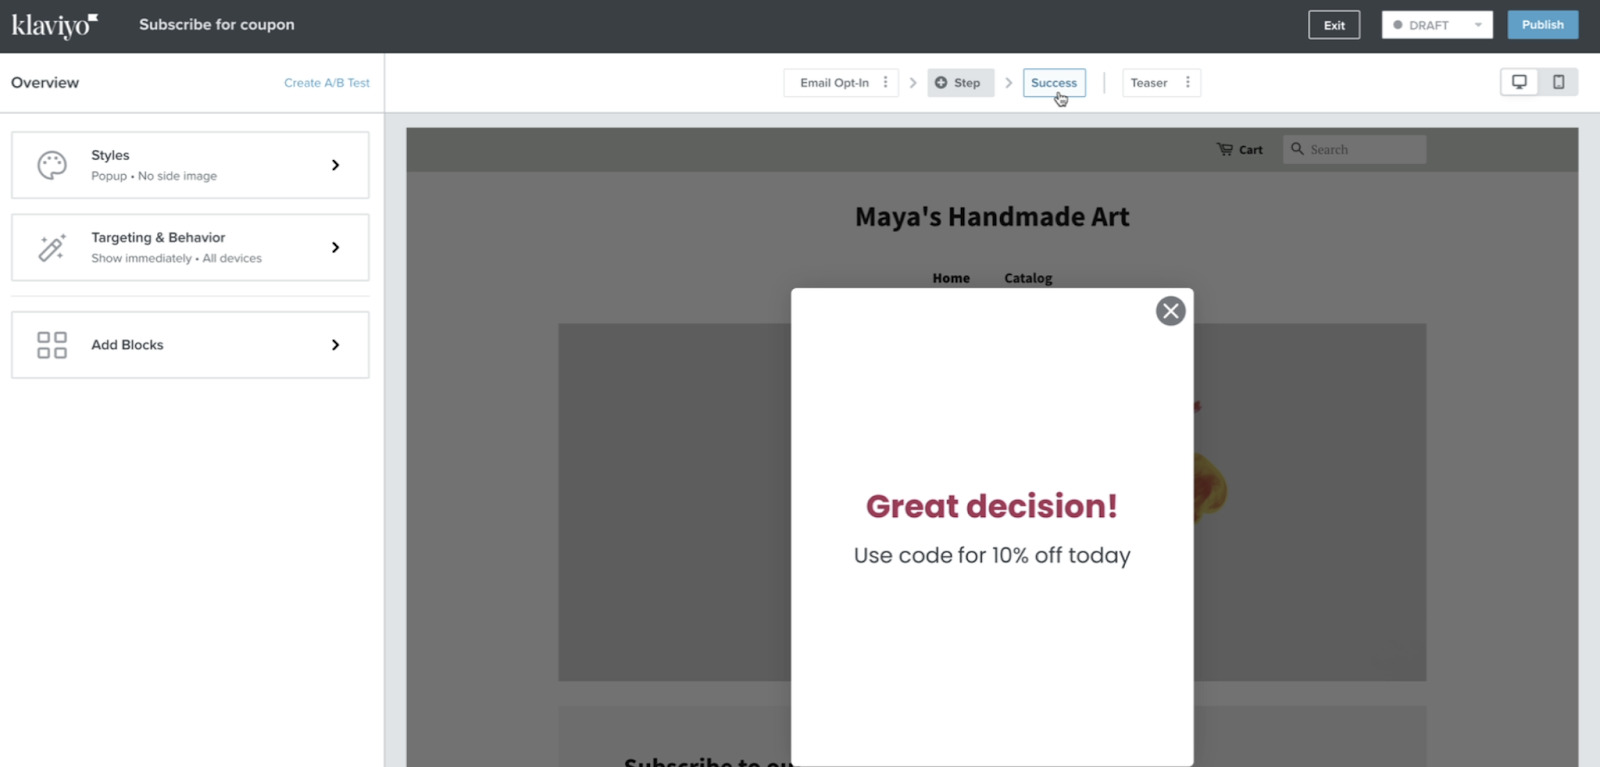
- On the left side of the Overview page, click on the Add Blocks tab.
- Under Elements, click on the Coupon block and drag it to your desired position in your form.
- Click on the Configure Coupon window in the form. In the settings menu on the left side of the builder, choose to set up a static or unique coupon in your form.
Set a Static Coupon in Your Form
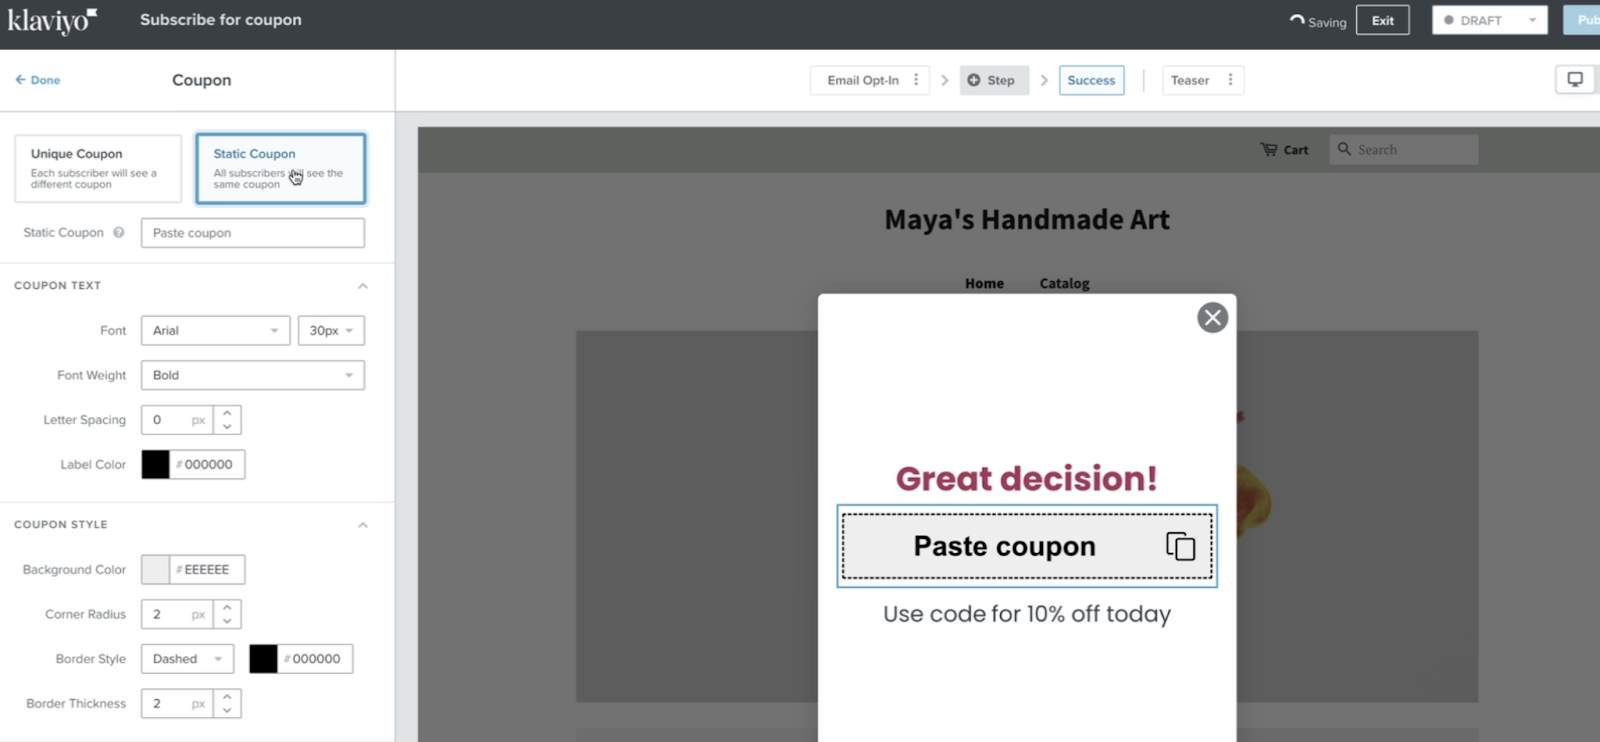
- At the top of the coupon settings menu, select Static Coupon.
- Type the name of your static coupon code in the text box (e.g., WELCOME20). If you don’t have an existing static code, you’ll need to create one manually in Shopify.
- If you’ve created a new static code, refresh the page of the form builder before typing it into the text box.
- Customize the style of your block (background color, border radius, border style, border thickness, and padding) to your liking.
- Once you're done editing, click on Create Coupon.
- Then click on Publish.
Set a Unique Coupon Code for Your Form
At the top of the coupon settings menu, select Unique Coupon. Depending on whether you are using a Shopify coupon or an uploaded coupon, your configuration will differ slightly.
Shopify-coupons
- Choose Shopify Coupon as your Unique Coupon Type.
- Click on the dropdown next to Unique Coupon to select an existing coupon, or click the plus sign (+) to create a new Shopify coupon.

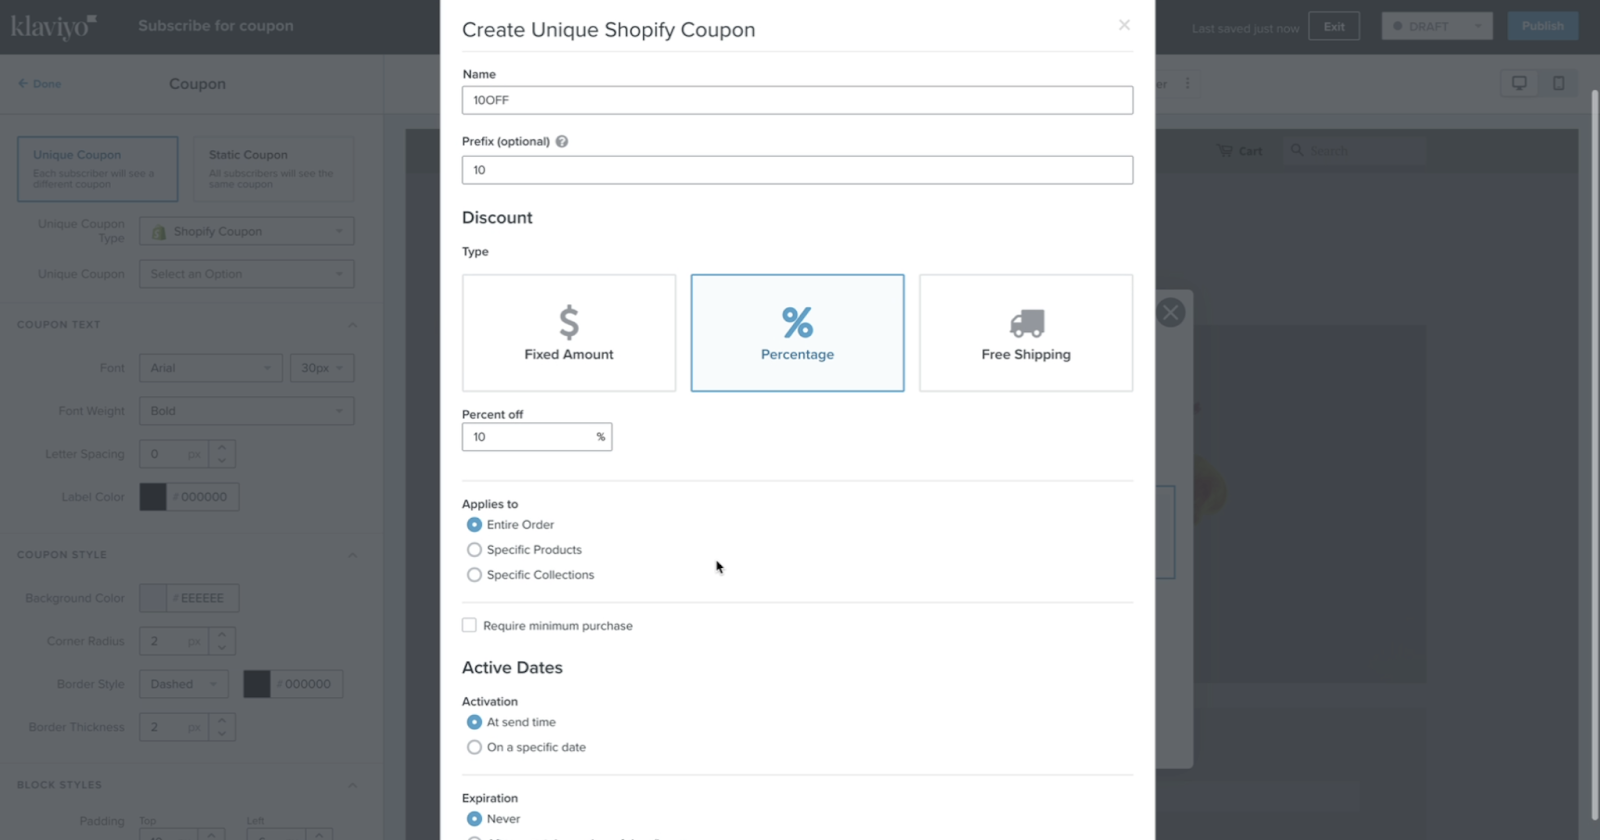
- If you chose to create a new unique Shopify coupon code, a pop-up window will appear asking you to:
- Give your coupon a name (e.g., 10KORTING) and optionally add a prefix.
- Select the type of discount you want to offer your customers (fixed amount, percentage, or free shipping).
- Choose the settings for how your coupon will work (amount, application, activation, and expiration date).
Note: If you select Never or On a specific date as the expiration date, Klaviyo will generate an initial batch of 600 unique codes when the coupon is added to the form, and will then generate more codes once the number of available codes falls below 400. If you select After a certain number of days/hours, Klaviyo will generate a batch of 600 codes every day.
4. Click on Create Unique Shopify Coupon in the bottom right corner. This will take you back to the form builder, with the newly created coupon code selected for use in the form.
Uploaded Coupons
- Choose Uploaded Coupon as your Unique Coupon Type.
- Click on the dropdown next to Unique Coupon to select an existing coupon or click on the link Create uploaded coupon.
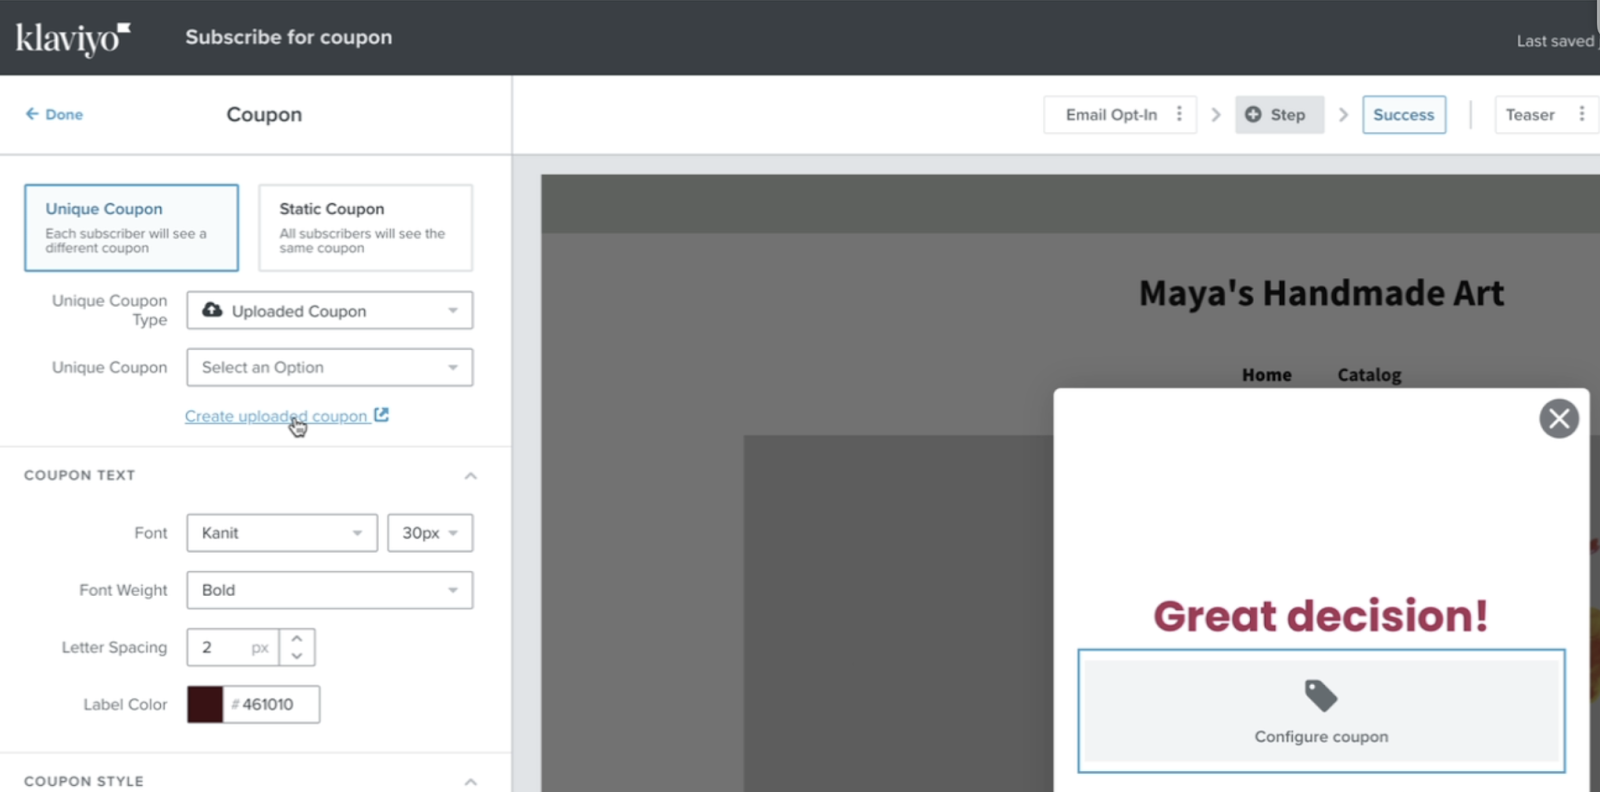
- If you chose to create a new uploaded coupon, the form will open in a new tab and you will be prompted to fill in the following information:
- The name of your coupon (e.g., 10PROCENTKORTING)
- Expiration date

- Click the Create Coupon button in the bottom right corner. This will take you to the Coupons page.
If you chose to create a new uploaded coupon, you will want to upload these codes before publishing the form so that each customer can receive a coupon after filling out the form.
- On the Coupons page, select the Uploaded Coupons tab at the top to see a complete list of your uploaded coupons.
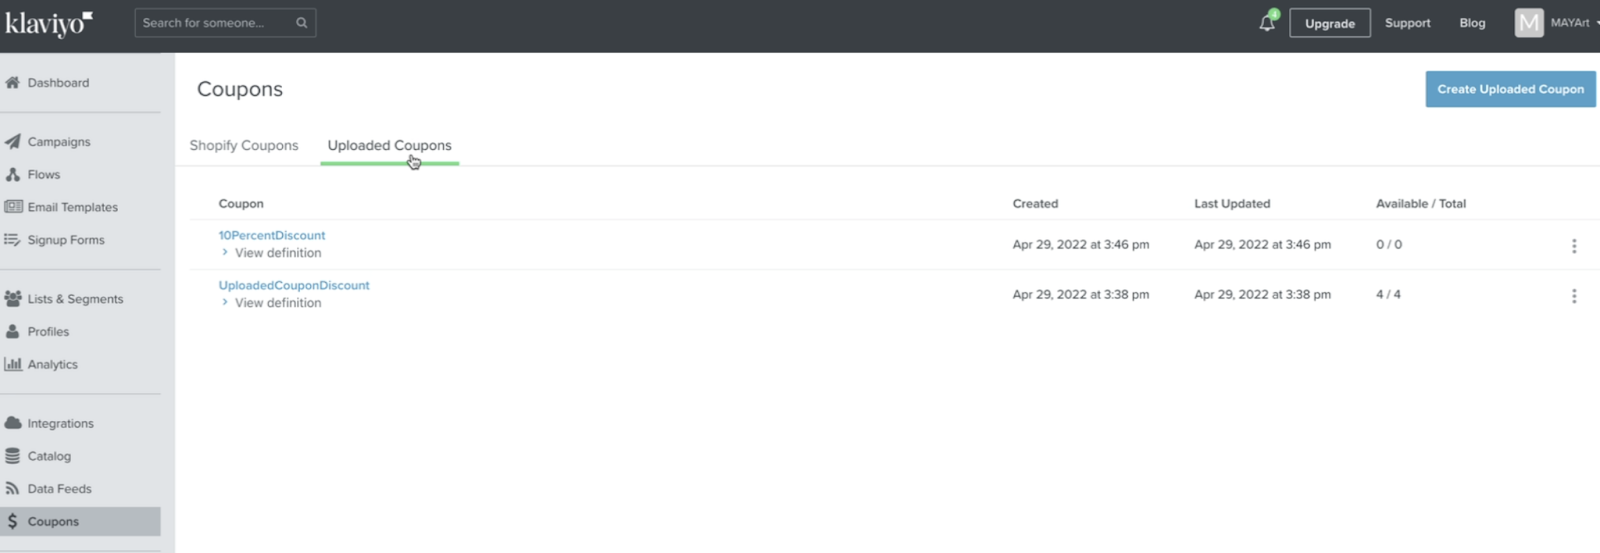
- Click the 3-dot menu (...) to the right of the uploaded coupon code you want to use for your form.
- Select Add Codes from the dropdown menu.
- Upload your CSV file to process these codes. You can refer to this guide for assistance with the upload.
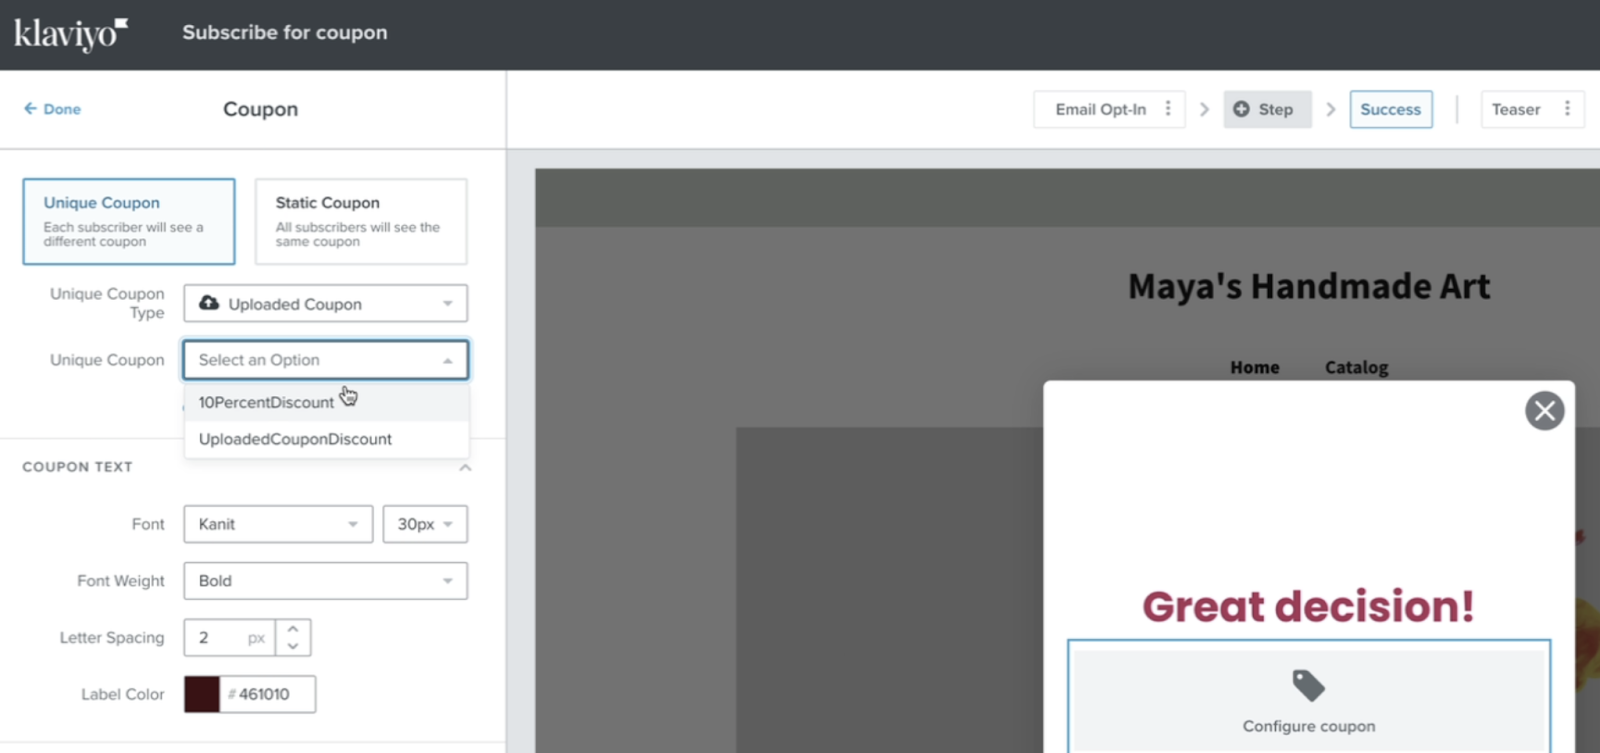
- Go back to the form builder tab and refresh the page.
- Click on the Success step again and select your newly uploaded coupon from the dropdown for Unique Coupon.
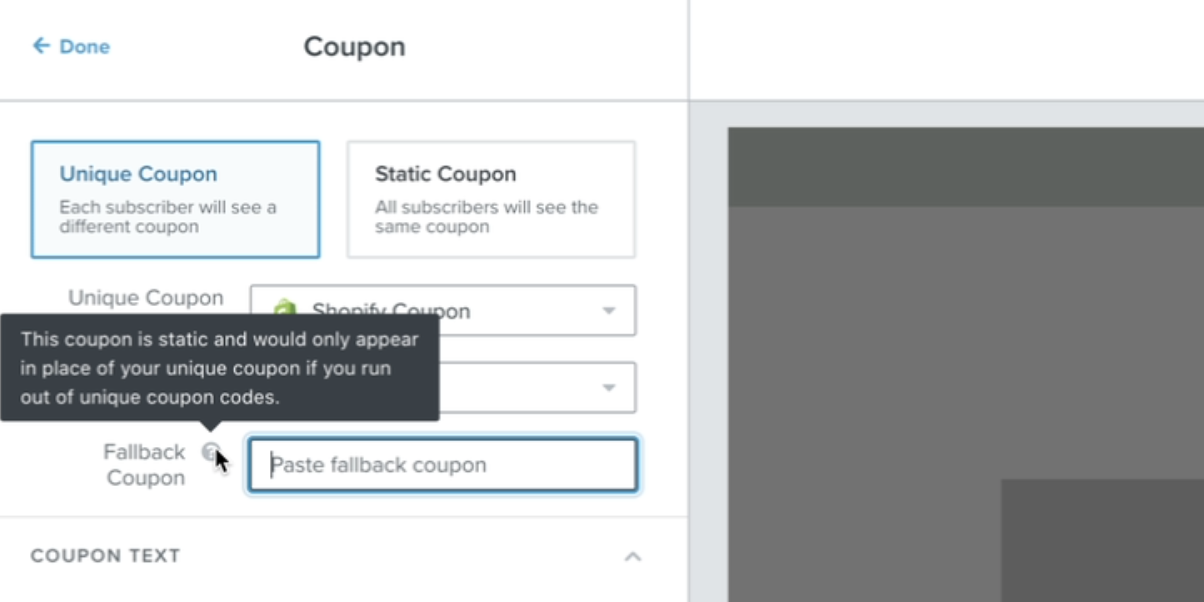
Add a fallback coupon
After you have configured and selected your unique coupon codes, we strongly recommend adding a fallback coupon before publishing the form. This is a static code that will only be displayed if you no longer have unique coupon codes available, ensuring that your customers still receive a coupon.
You must first create a static coupon in Shopify or upload one to Klaviyo to paste it into the fallback coupon text box (for example, 10PERCENT).
Complete editing and publish your sign-up form
After you have set up coupons for your form:
- Make any final adjustments to the formatting and text of your coupon
- Click on Publish in the upper right corner
- Go to your website and refresh the page to see your form appear.
It may take some time for the form to show up on your website while the unique coupon code is being generated.
- Fill out the form to test if your coupon is processed correctly. Once this is confirmed, customers will receive a coupon code directly in the success message of your form.
Note that if you have used a static or unique Shopify coupon in your sign-up form, it will automatically be applied on the Shopify checkout page of a customer when they copy the code from the success message of the form.
Do you have any questions about how to add coupon codes to sign-up forms after reading this article? Contact Polaris Growth for more advice.

Blog posts van Polaris Growth
Andere artikelen


Polaris Growth is a CLV e-commerce agency. We support ambitious online stores with: Klaviyo CRM, conversion optimization, data & analytics and ecommerce strategy.