


Learn how to enable the BigCommerce integration in Klaviyo, add ‘viewed product tracking,’ and confirm that all ‘onsite tracking’ is working correctly for your webshop.
When you integrate Klaviyo with BigCommerce, your historical e-commerce, customer, and catalog data are synchronized with your Klaviyo account. The integration automatically adds Klaviyo’s ‘on-site tracking snippet’ to your BigCommerce store, allowing you to add Klaviyo signup forms to your site and track when customers are active on your site. The BigCommerce integration also sets up real-time synchronization to capture future data. Once all your BigCommerce data is synced with Klaviyo, you can use some of Klaviyo’s core features, such as:
- Segments to target your best customers;
- Flows to automate messaging based on e-commerce events;
- Campaigns to send personalized messages using customer data and products from your catalog.
Video on BigCommerce and Klaviyo
This video explains how to integrate BigCommerce with Klaviyo.
Enabling the BigCommerce Integration
There are three ways to connect your BigCommerce store to Klaviyo:
- Via the BigCommerce App Marketplace, where the platform prompts you to create a Klaviyo account or log in to your existing account;
- Via the Klaviyo account setup wizard;
- Via the ‘Integrations’ tab in your Klaviyo account.
In this article, we’ll use the third method, the ‘Integrations’ tab.
Whichever method you choose, the result is the same. If you haven’t integrated your store yet or are switching e-commerce platforms, follow these steps to enable the integration via the ‘Integrations’ tab:
- Open your Klaviyo account, the admin for your BigCommerce store, and your BigCommerce storefront in separate tabs.
- In Klaviyo, click on your account name in the lower-left corner and select ‘Integrations’.
- Click on ‘All Integrations’ and search for BigCommerce. Then, click ‘Add Integration’.

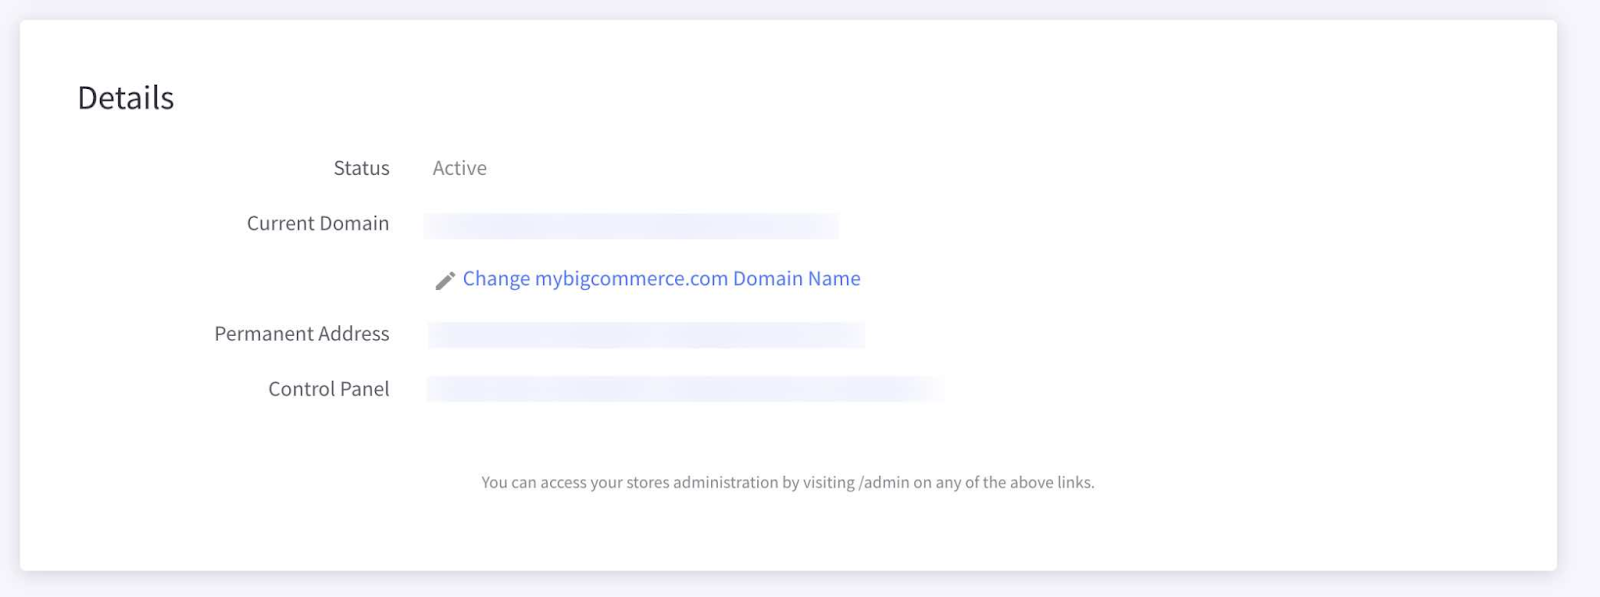
- Under ‘Store URL’, enter the permanent address of your store. This permanent address is not the same as the URL where customers visit your store. The permanent address is a unique URL that BigCommerce uses to manage your store. To find this address, go to your BigCommerce admin and navigate to ‘Account Settings’ > ‘Store Details’. Scroll down to find the permanent address for your store under ‘Permanent Address’.
5. Check the box to automatically add Klaviyo on-site JavaScript. This enables onsite tracking and forms.
6. If you want to collect email subscribers during checkout, check ‘Collect email subscribers’. This will subscribe contacts who sign up during checkout or through the BigCommerce footer form. Choose the Klaviyo list you want to add them to from the dropdown menu, or create a new list.
7. To collect SMS subscribers who sign up through BigCommerce, check the ‘Collect SMS subscribers’ option. However, you need to set up SMS for your Klaviyo account before enabling this feature.
8. If you're collecting SMS subscribers during checkout, select the list to which you want to add them from the dropdown menu. You'll also be asked to include links to your terms of service and privacy policy and copy a code snippet into your BigCommerce checkout file. Follow Klaviyo’s guide, ‘Collecting SMS consent at checkout with BigCommerce,’ to see how to do this.
9. Click ‘Connect to BigCommerce’ and confirm the integration.
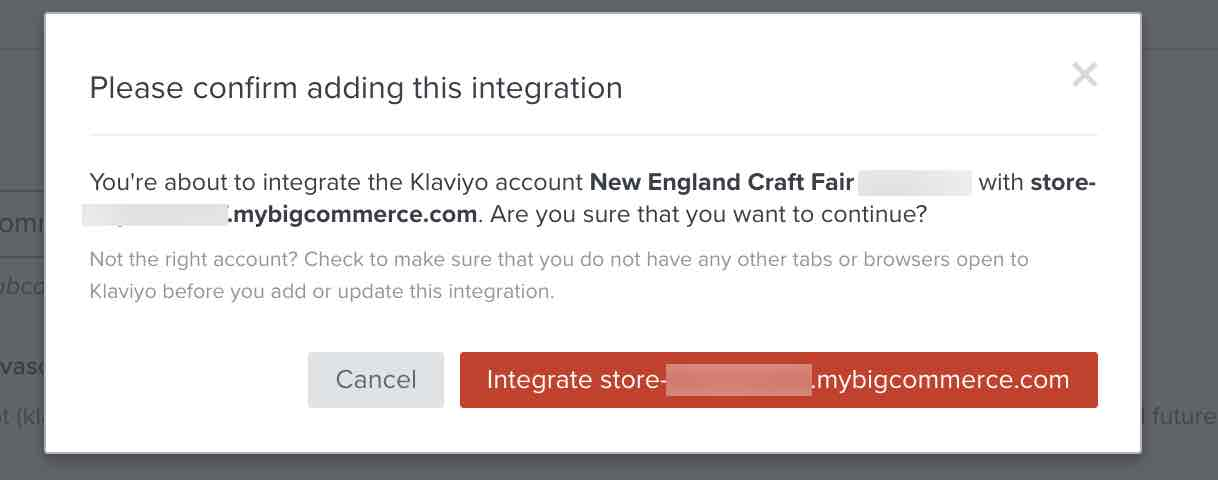
10. Click to integrate your store, which will then take you to the Klaviyo app in the BigCommerce App Marketplace.
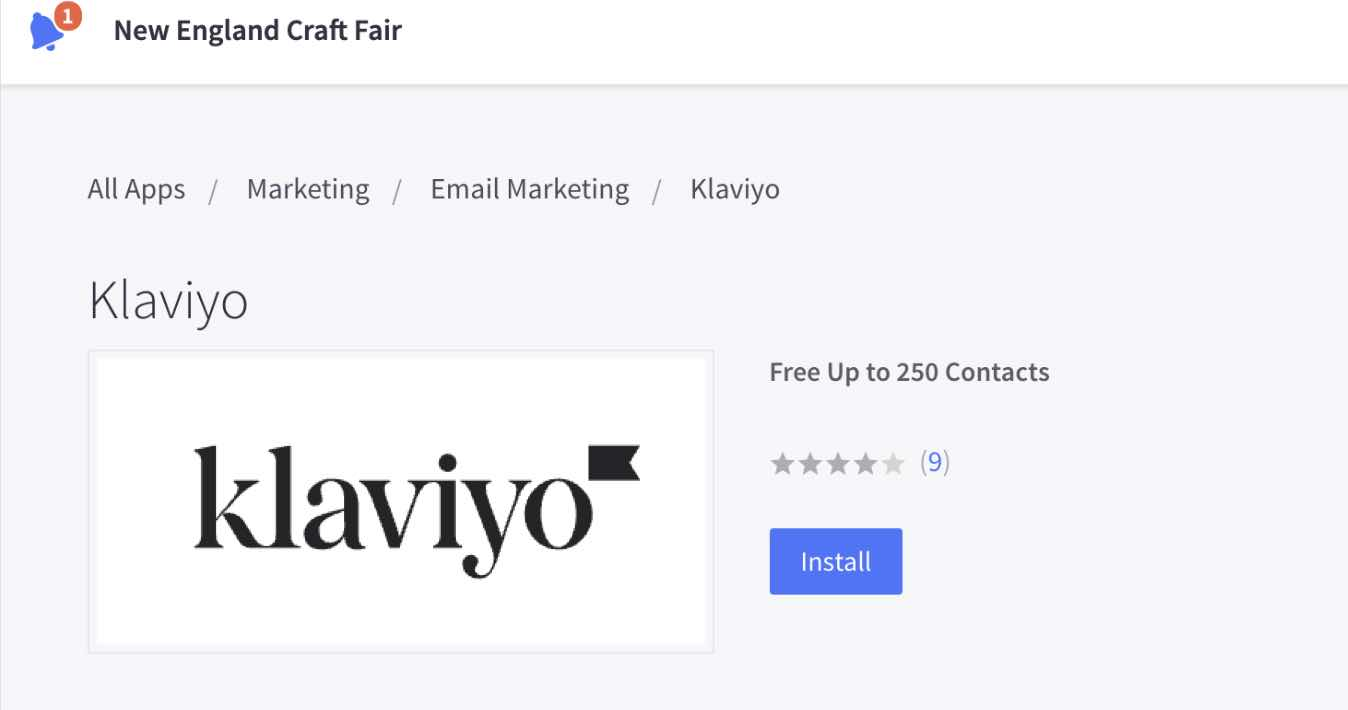
11. Click ‘Install’ and review the listed terms before confirming.
12. Click ‘Confirm’. Your Klaviyo account will open in your BigCommerce admin window, and a green ‘success callout’ will confirm that the synchronization has started. Within a few minutes, your data will begin syncing with Klaviyo.
Have you completed all the steps? If so, you've successfully enabled the BigCommerce integration.
Confirm Onsite Tracking Installation
When you integrate with BigCommerce, a Klaviyo.js file, which enables onsite tracking, is automatically installed in your BigCommerce store once you’ve checked the relevant setting. Klaviyo performs two tasks:
- Klaviyo allows you to add signup forms to your site from within your Klaviyo account.
- Klaviyo adds Active on Site tracking, which allows you to track when customers visit your webshop.
There’s nothing more you need to do, but you can check if Klaviyo.js is working correctly. Here’s how:
- In your Klaviyo account, click on your account name and select ‘Integrations’.
- Next, click ‘Setup Web Tracking’ in the top right corner. You’ve already completed the first step during the integration. We will go through the second step, ‘Viewed Product’ tracking, in the next section.
- Now, move on to the third step and enter your store URL in the provided box. Then, click ‘Next’.
- Click on the generated link to be redirected to your store.

5. Once you're back in Klaviyo, check via the ‘success button’ to see if any data has been received. This confirms that web tracking is working successfully.
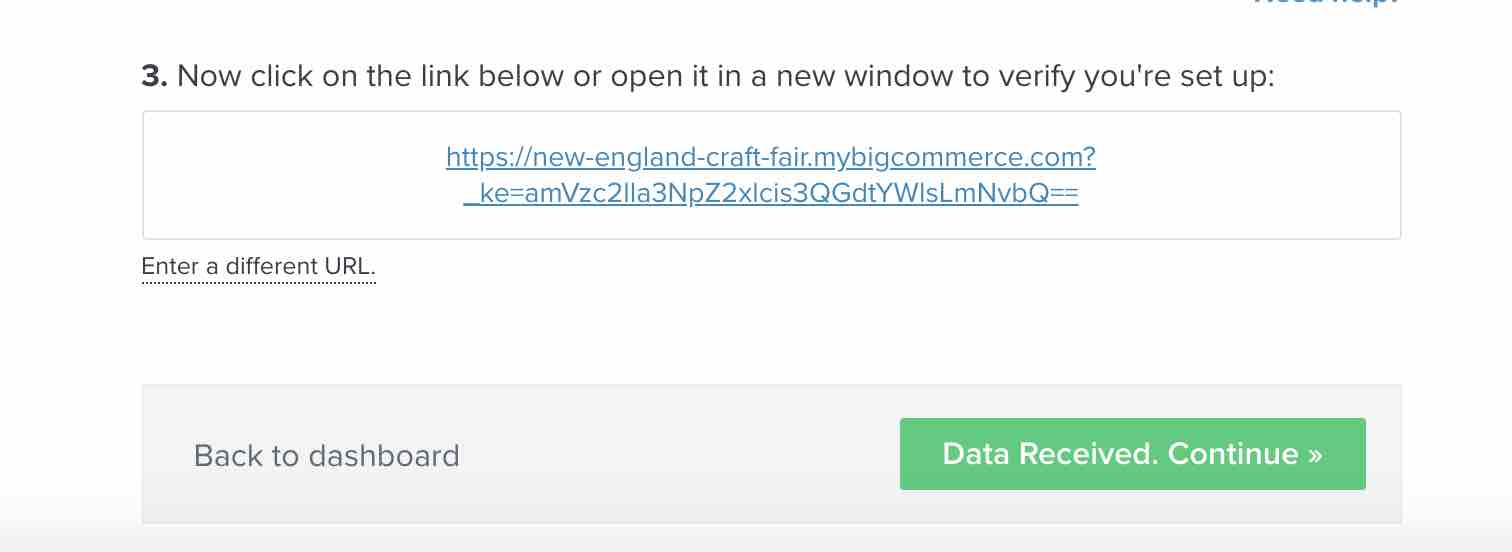
6. Click the green ‘success button’ to return to the Klaviyo dashboard.
Adding ‘Viewed Product’ Tracking
With ‘Viewed Product’ tracking, you can monitor when customers view your products. To enable this, you need to add a ‘Viewed Product’ code snippet to your BigCommerce Theme file. ‘Viewed Product’ tracking is essential for building flows like a browse abandonment flow. You can learn more about this in the article ‘Creating a Browse Abandonment Flow’.
Here’s how to set it up:
- In your Klaviyo account, click on your account name in the lower-left corner and select ‘Integrations’.
- In the top-right corner, click ‘Setup Web Tracking’.
- You’ve already completed the first step of the integration.
- Copy the ‘Viewed Product’ snippet from the second step.
5. Next, paste the ‘Viewed Product’ code snippet into your BigCommerce theme file. Follow these steps:
- Open a new tab and log into your BigCommerce dashboard.
- Navigate to ‘Storefront’ > ‘My Themes’.
Once there, proceed to paste the code snippet into the appropriate theme file following the steps mentioned in the previous instructions.
6. Within ‘Current Theme’, click on the ‘Advanced Settings’ dropdown menu and select ‘Edit Theme Files’.
- Note: If you're using a default theme, the option to edit theme files won’t appear. In this case, first make a copy of the theme and then make your edits in the copied version. Any changes you make will apply only to the theme you're editing.
- Important: If you update or change your theme in the future, you’ll need to reinstall the ‘Viewed Product’ tracking in your new theme.

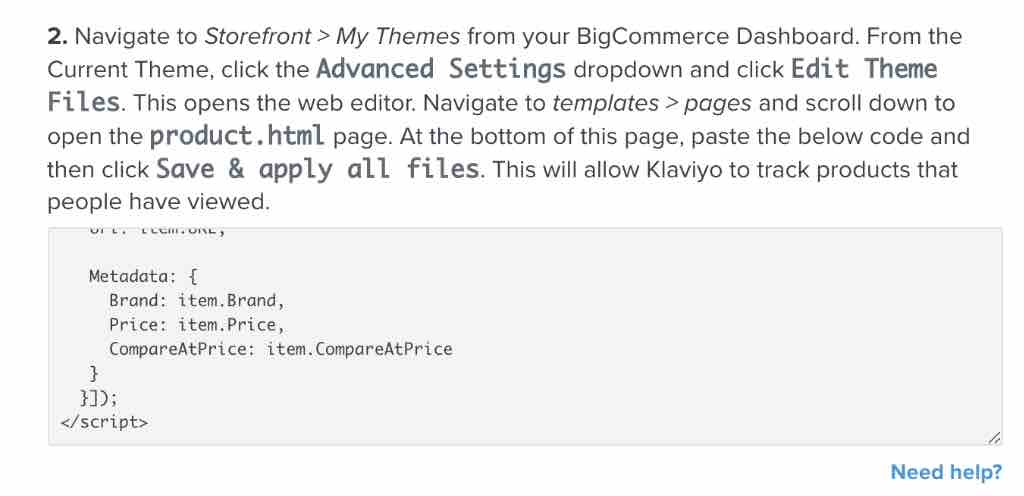
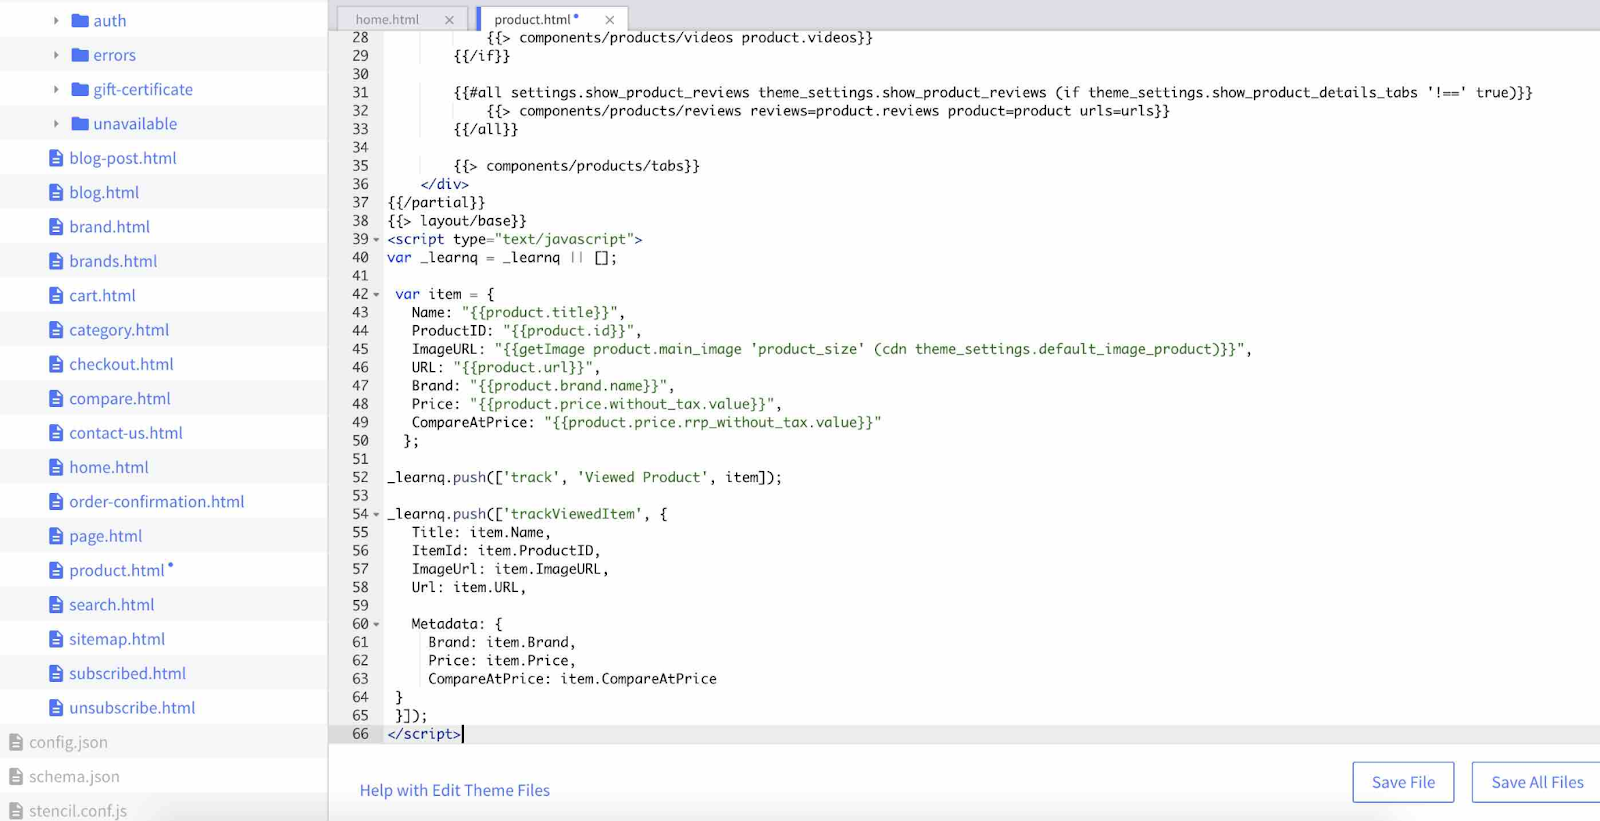
7. In the editor, navigate to ‘Templates’>‘Pages’, scroll down, and click to open the product.html page.
8. Paste the ‘Viewed Product’ snippet at the bottom of this page. Then, click ‘Save all files’ to apply your changes.
You have now enabled ‘Viewed Product’ tracking on all your product pages.
Data synchronized with Klaviyo
The BigCommerce integration syncs with Klaviyo in real-time. After enabling BigCommerce, the following customer information will be synchronized:
- Sales and order data, including which products were purchased, product images, price, and quantity.
- Customer information such as first name, last name, and how they found your store.
- Location information is only synchronized with Klaviyo if the customer has placed an order.
- Completed orders, refunds, and canceled order data.
- When people visit your website and which products and collections they view.
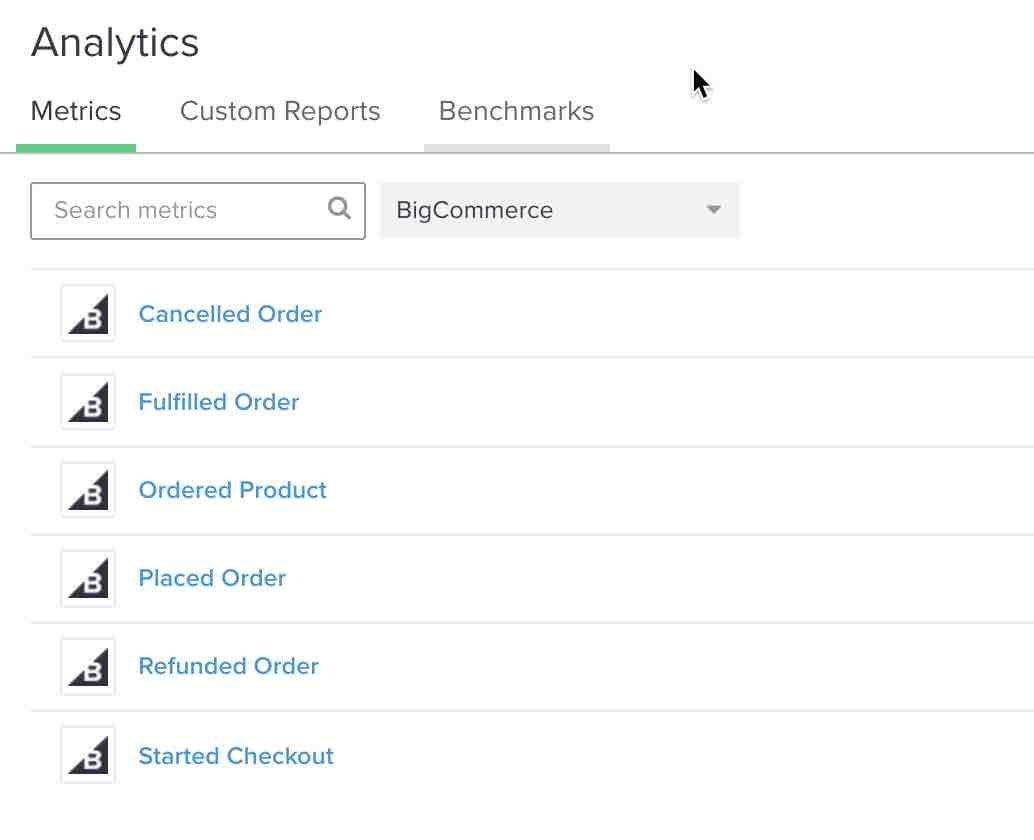
How to view BigCommerce event data in your Klaviyo account:
- Click on the ‘Analytics’ dropdown menu and select ‘Metrics’.
- In the top-right dropdown, select BigCommerce to display all BigCommerce events.
- BigCommerce events are marked with the BigCommerce icon.
3. Read here to learn more about your BigCommerce data for a complete overview of all data types and specific events that are synchronized with Klaviyo.
Klaviyo limits the number of unique metrics you can create to 200. When you approach this threshold, you'll receive a warning notification in your account, and the account owner will also be notified via email.
Result
You’ve successfully enabled the BigCommerce integration, confirmed that onsite tracking is working, and added ‘Viewed Product’ tracking to your store.
Next Steps
Congratulations on completing the installation! Now that the integration is working, it’s time to add Klaviyo’s core features to start generating revenue and growing your business. Once you’ve completed the items in the list below, you’ll be fully equipped to get the most out of Klaviyo’s functionality:
- Set up your welcome series flow.
- Set up your abandoned cart flow.
- Add a Klaviyo signup form to your site. Klaviyo also offers go-to options for using existing forms or third-party form providers. However, we recommend using Klaviyo forms as they are free and allow you to target important Klaviyo segments.
- Create your core segments (Engaged, Unengaged, VIP).
- Send your first campaign.
Need help with the integration between Klaviyo and BigCommerce? We can assist you! Contact us here.
This article has been translated from English to Dutch. View the original on this page.

Blog posts van Polaris Growth
Andere artikelen


Polaris Growth is a CLV e-commerce agency. We support ambitious online stores with: Klaviyo CRM, conversion optimization, data & analytics and ecommerce strategy.