

Push notifications—those handy alerts on your phone that keep you informed about updates, news, or special offers. Convenient, right? Definitely! But it’s not just the recipients who benefit. As a webshop owner, using push notifications is a smart move. It’s an easy way to promote a new product to your customers. Push notifications are useful and come with several advantages. That’s why, in this article, we’ll explain how to enable them in Klaviyo.
Three Requirements
So, you want to use push notifications? Great idea! But before you can start, there are three conditions you need to meet:
- You have your own mobile iOS app.
- You’ve generated an APN Authentication Key from Apple and uploaded it to Klaviyo (details below).
- You’ve installed the Klaviyo SDK and set up activity tracking and push notifications in your iOS app.
Setting Up Push Notifications
Once you meet these three requirements, follow these steps to set up push notifications in Klaviyo:
- Click on the organization name in the bottom-left corner.
- Navigate to Settings > Push Notifications.
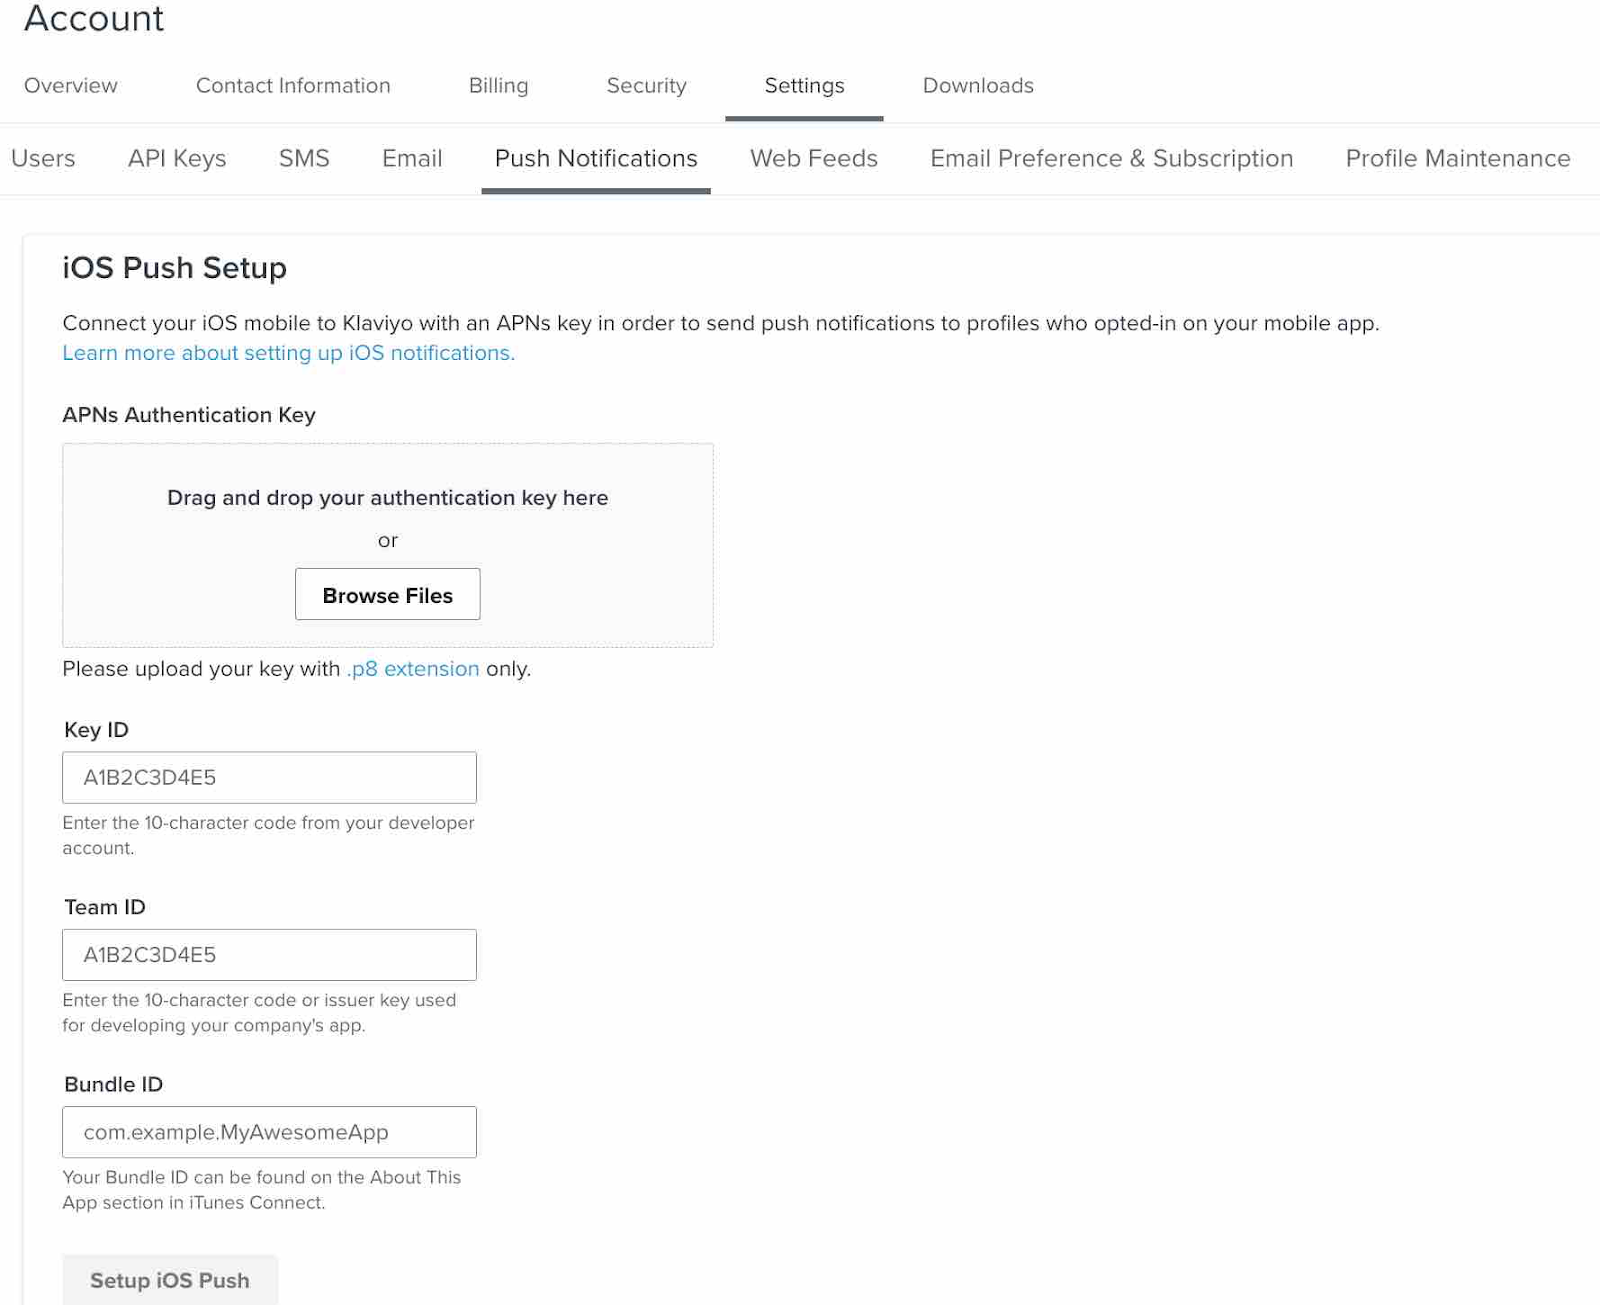
3. Fill in the required information. Note: You will need access to the “APN Authentication Key” and the “Key ID”. Learn more about roles and associated permissions here.
- APN Authentication Key
If you don’t have an APN Authentication Key yet, create one. Ensure you select APN as the key type. Once the key is created, download the.p8file and upload it to your Klaviyo account. - Key ID
Navigate through your list of keys to find your Key ID. Click on the key to view more details, and from there, you can copy the Key ID. - Team ID
Here's where you can find your Team ID. - Bundle ID
Follow these steps to find your Bundle ID:- Log in to your iTunes Connect account.
- Click on “My Apps”.
- Select your app. Your Bundle ID will be available on the app information page.
4. After entering all the required information, click “Setup iOS Push”.
Finally, a green pop-up will confirm that your app has been successfully linked to your Klaviyo account. You’re all set!
Want to know more?
- Read here How to use push notifications for campaigns and flows in Klaviyo.
- Read here How to integrate your Klaviyo account with Facebook advertising.

Blog posts van Polaris Growth
Andere artikelen

Polaris Growth is a CLV e-commerce agency. We support ambitious online stores with: Klaviyo CRM, conversion optimization, data & analytics and ecommerce strategy.