


How to Set Up an Opt-In Rule in Trengo
By integrating Klaviyo with Trengo, you can automate processes in Trengo based on triggers in Klaviyo. In this article, we will show you how customers can sign up (and unsubscribe) for your WhatsApp newsletter in Klaviyo.
What is an Opt-In Rule?
An opt-in rule (registration rule) is a consent system that allows people to indicate that they want to receive your emails, typically by signing up or checking a box. It ensures that you only send emails to people who are genuinely interested, which helps build an engaged audience and complies with regulations against unsolicited emails.
Before you can start with the actual 'opt-in/opt-out' flow, it's important to activate your phone number in Klaviyo.
Activate Your Number for Opt-In in Klaviyo
To activate your phone number in Klaviyo for the 'subscribe or unsubscribe' function, follow the steps below:
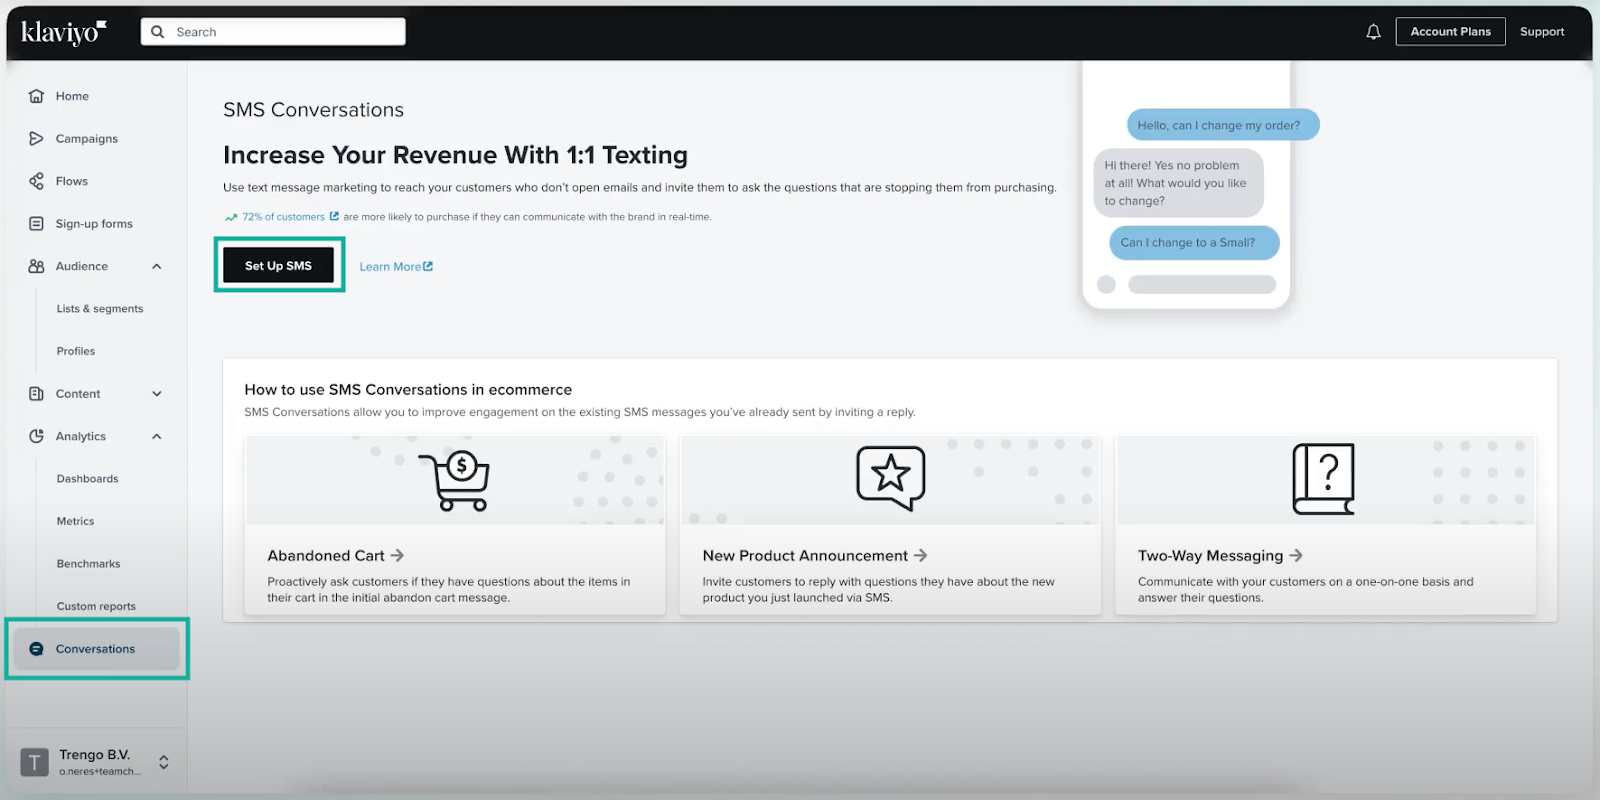
Navigate to Klaviyo > Conversations > Set up SMS;
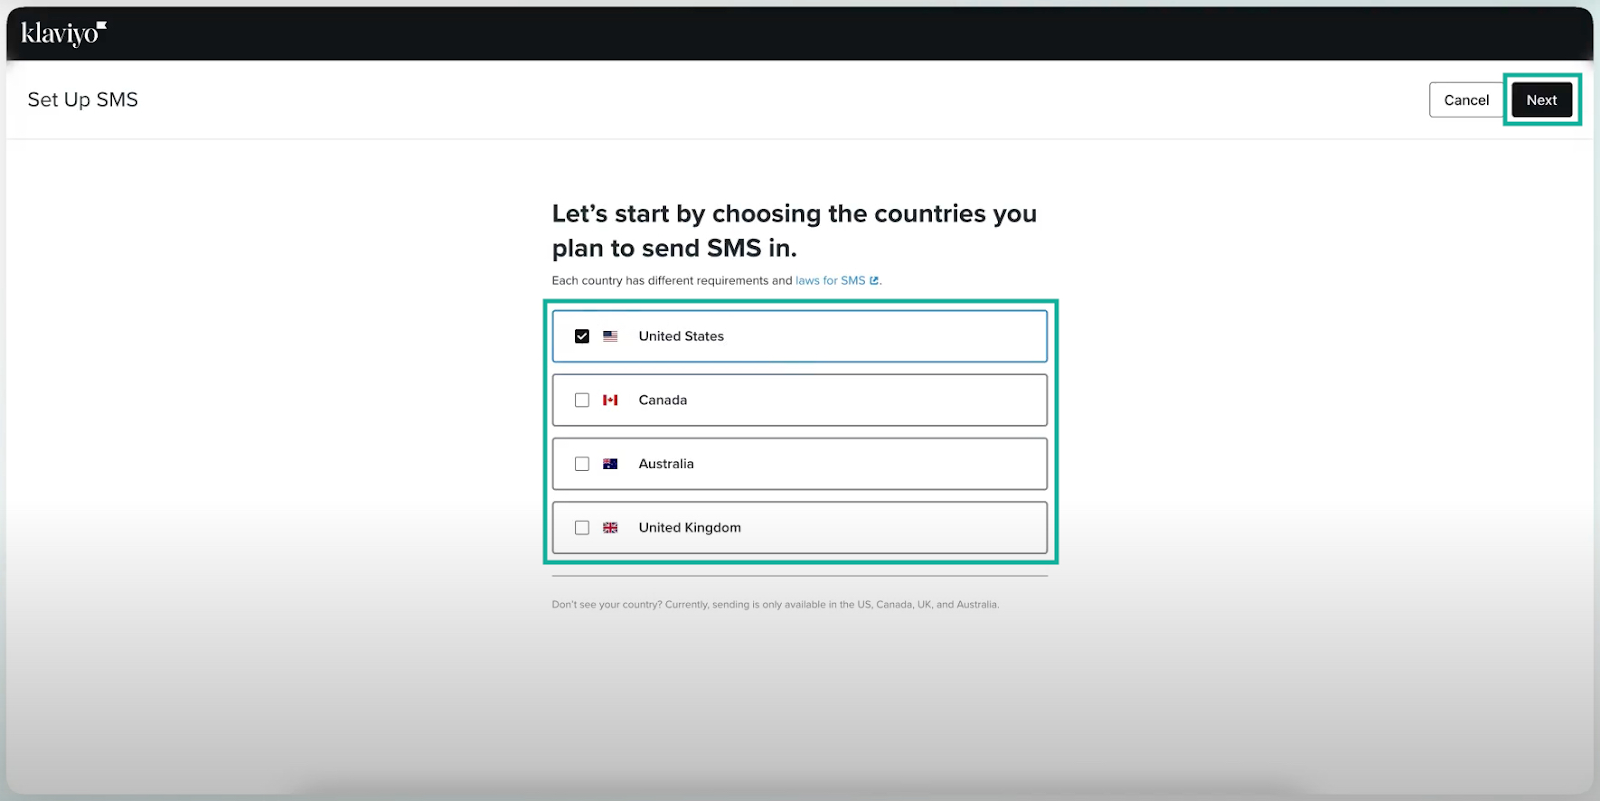
Choose a country and click 'Next'. Note that you don't need to reside in the selected country;
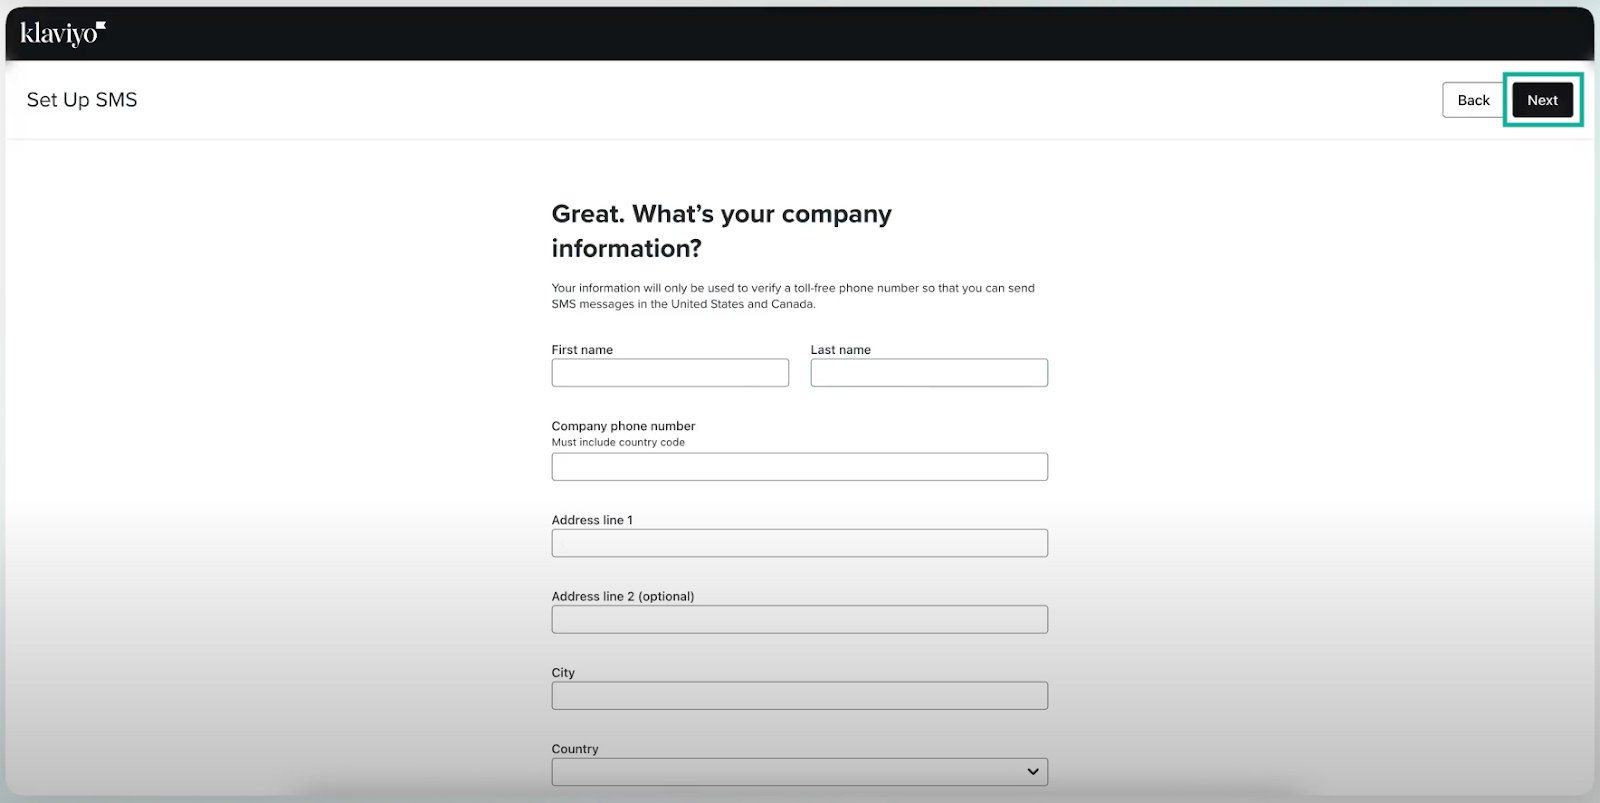
Fill in your information and click 'Next';
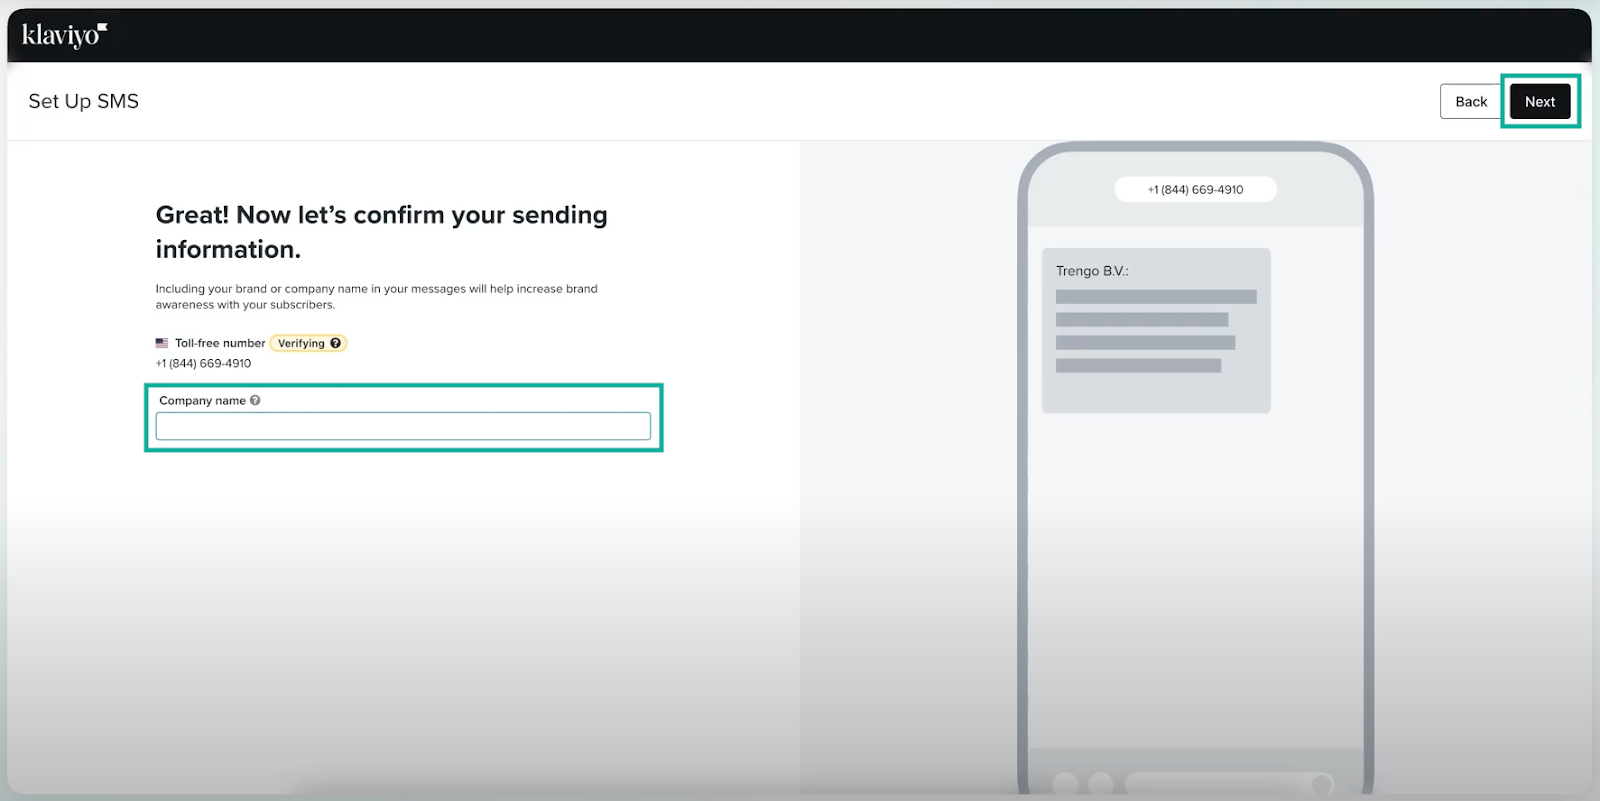
Add your business name and click 'Next'.
You have now added your phone number to Klaviyo. The next step is to set up the opt-in rule for your customers.
Setting Up an Opt-In Rule in Trengo
Follow the steps below to set up an opt-in rule in Trengo. You can also use these steps to set up your opt-out.
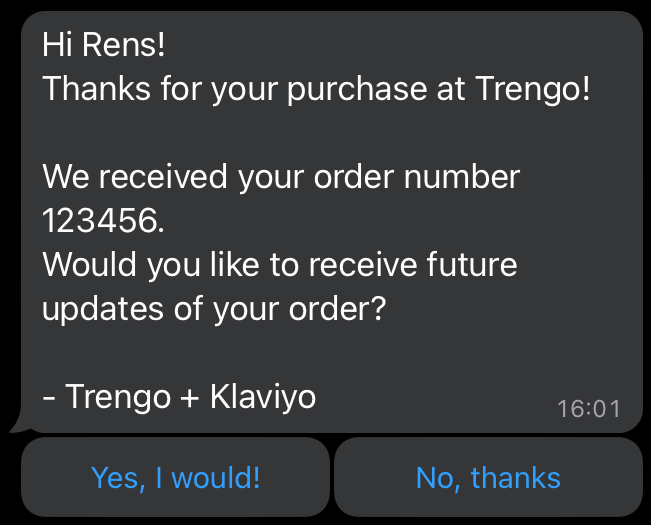
1. Ensure you have an approved WhatsApp template that asks your customer if they want to sign up. Allow your customer to respond with buttons; otherwise, the rule you are going to set up will not work consistently;
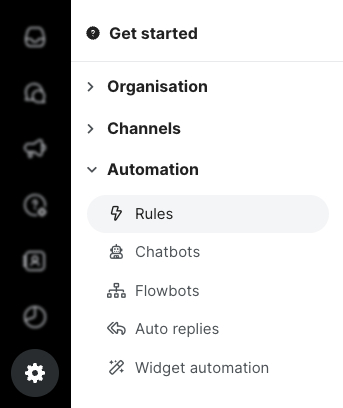
2. In Trengo, navigate to Settings > Automation > Rules, and click the 'plus' icon or 'Add rule';
Set the rule as follows:
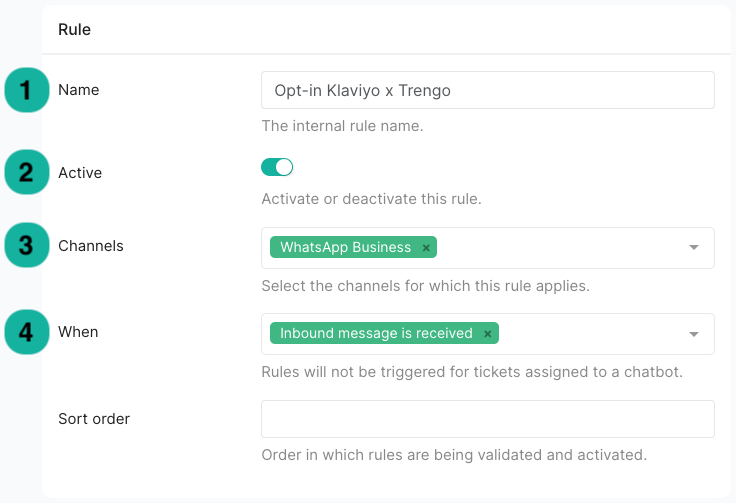
- Name: Enter a suitable name for this rule.
- Active: Leave this switch enabled.
- Channels: Select the WhatsApp Business channel where the template you created is active.
- When: Set this to 'Incoming message received'.
ℹ️ You can leave 'Sort order' empty.
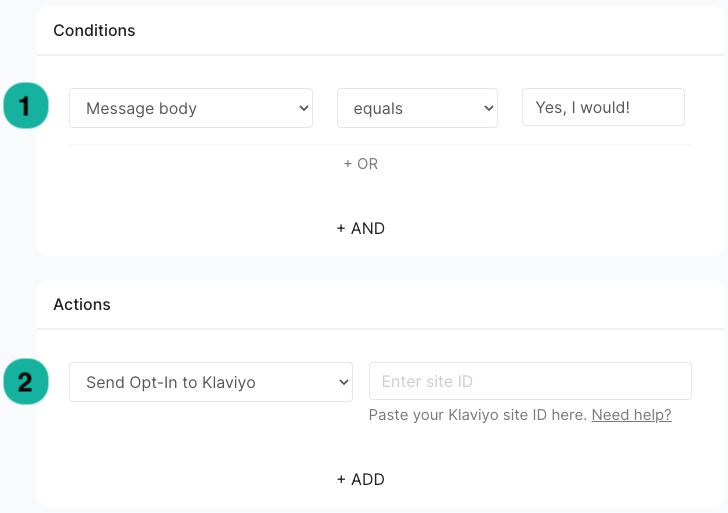
- Conditions: Set Message body > Is equal to the text of the button your customer would use to agree to receive your messages. In this case, it would be 'Yes, I would!', according to the example above.
- Actions: Choose ‘Send Opt-in to Klaviyo’ and enter your Site ID.
ℹ️ This site ID can be found by navigating to Klaviyo > Account > Settings> API Keys, under 'Public API Key'.
After clicking 'Save', you have successfully created a rule that allows customers to opt-in or opt-out for your WhatsApp newsletter.
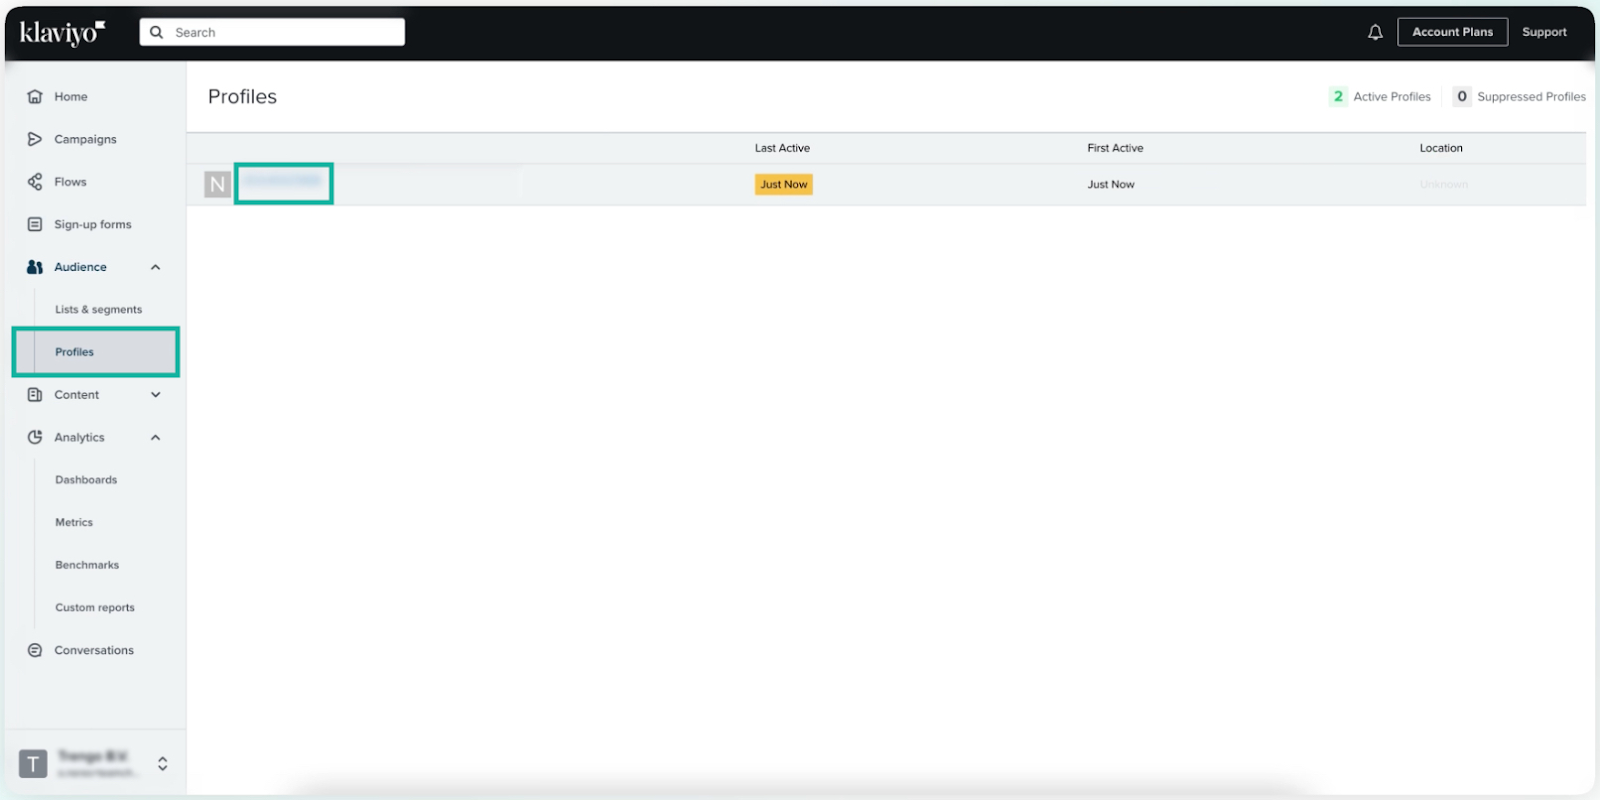
Confirm an Enrollment in Klaviyo
Follow the steps below to check which customers in Klaviyo have signed up via your WhatsApp template and rule in Trengo.
Navigate to Klaviyo > Audience > Profiles and click on the customer’s phone number;

Blog posts van Polaris Growth
Andere artikelen


Polaris Growth is a CLV e-commerce agency. We support ambitious online stores with: Klaviyo, conversion optimization, data & analytics and ecommerce strategy.